
Okay, let’s talk chicken thighs! Honestly, for so long, I thought chicken breast was the only way to go. But then I discovered the magic of chicken thighs, and my world, and my dinner table, completely changed. They’re just so forgiving, so flavorful, and honestly, way more exciting! If you’re new to cooking or just looking for some foolproof ways to whip up some amazing chicken, you’ve landed in the right spot. This is The Ultimate Chicken Thigh Recipes Guide for Beginners, and I promise, it’s going to make you feel like a kitchen pro in no time. I remember fumbling around trying to get chicken right when I first started out – it was either too dry or kinda bland. But chicken thighs? They’re practically designed to make you look good, and this guide is going to show you exactly how easy it can be.
Why This Crispy Chicken Thighs Recipe is Perfect for Beginners
Honestly, if you’re just starting out in the kitchen, chicken thighs are your new best friend. This recipe, in particular, is practically foolproof. We’re talking minimal ingredients that you probably already have, and the steps are super straightforward. Chicken thighs are way more forgiving than chicken breasts – they stay wonderfully moist and tender even if you cook them a minute or two too long. This means less stress for you and a delicious, crispy result every single time. Plus, the leftovers? Fantastic for meal prep throughout the week. It’s a win-win!
Essential Ingredients for Crispy Chicken Thighs
Alright, let’s get down to what you’ll need to make these amazing crispy chicken thighs with that dreamy cream sauce. Trust me, it’s not a long list, and the stars of the show are pretty simple things that pack a ton of flavor. We’re talking about building a really solid foundation here, and these ingredients work together like a dream team.
Chicken and Seasoning
First up, you’ll need 4 skin-on, bone-in chicken thighs – aim for about 2 pounds total. The skin is key for that lovely crispiness we’re after! Then, just grab your Kosher salt and some good quality, coarsely ground black pepper. We’ll use 1 1/2 teaspoons of each, sprinkled generously all over the chicken. This simple seasoning is crucial for bringing out the chicken’s natural flavor and getting that skin perfectly browned.
For the Cream Sauce
Now for the sauce! It sounds fancy, but it’s super easy. You’ll need about 1/3 cup of champagne vinegar and the same amount of dry white wine – don’t worry, the alcohol cooks off! Grab 2 shallots and chop them up finely. We’ll also add the juice from half a lemon for brightness and 2 bay leaves for a subtle herbal note. Then, about 1/2 cup of heavy cream makes it nice and rich. The real magic happens with 1/2 pound of unsalted butter, cut into cubes. It sounds like a lot, but it makes the sauce unbelievably silky! Finally, some fresh, chopped chives for a pop of color and a little bit of salt and pepper to finish it off.
Step-by-Step Guide to Your Ultimate Chicken Thigh Recipes
Alright, let’s get cooking! This is where the magic happens. Don’t be intimidated by the sauce part; I’ll walk you through it. It’s really just a few simple steps that build on each other. So, preheat your oven to 450°F (that’s pretty hot, which is good!). You can start thinking about how this recipe fits into a solid meal plan.
Preparing the Chicken Thighs
First things first, grab those paper towels and really, *really* pat your chicken thighs dry. Like, get ’em as dry as possible. This is super important for getting that skin crispy – moisture is the enemy of crispiness, you know? Now, sprinkle both sides generously with your 1 1/2 teaspoons of salt and pepper. Heat up a good oven-proof skillet over medium-high heat. Once it’s hot, lay the chicken thighs in, skin-side down. Let them cook without touching for a good 11 to 12 minutes. You want that skin to get beautifully golden brown and really start to crisp up. When it’s done, carefully turn off the heat, grab your tongs and more paper towels, and carefully remove all that excess fat from the skillet. Leave just a thin film of oil behind.
Roasting and Resting the Chicken
Now, carefully transfer that skillet straight into your preheated oven. Let it roast for about 6 to 8 minutes. After that, flip the thighs so they’re skin-side up again and pop them back in for another 6 minutes, or until they’re cooked through. You’re looking for no pink near the bone. Once they’re done, take them out and put them on a plate, skin-side up, to rest for a few minutes while you whip up that yummy sauce. Wipe out the skillet really well. For more inspiration on pan-searing, you can check out resources like Food Network’s guide.
Crafting the Cream Sauce
While the chicken is resting, let’s make that sauce. Grab a small saucepan and combine the champagne vinegar, white wine, finely chopped shallots, lemon juice, and those bay leaves. Bring this to a simmer over medium heat and let it bubble away until it’s reduced down to almost a paste, about 8 to 10 minutes. It’ll smell amazing! Then, pour in the heavy cream and let it simmer again until it’s reduced to about 2 tablespoons – it should be nice and syrupy. Now, turn the heat down to low, fish out those bay leaves, and start adding your cold, cubed butter, one chunk at a time. Whisk constantly! This is called emulsifying, and it takes about 4 minutes. You want it to get smooth and wonderfully creamy. Super important: don’t let the sauce get too hot, or it might separate. If it looks like it’s getting weird and splitting, just take it off the heat for a second, maybe toss in two ice cubes, and whisk like crazy until it comes back together. It’s a little bit of kitchen science!

Finishing and Serving
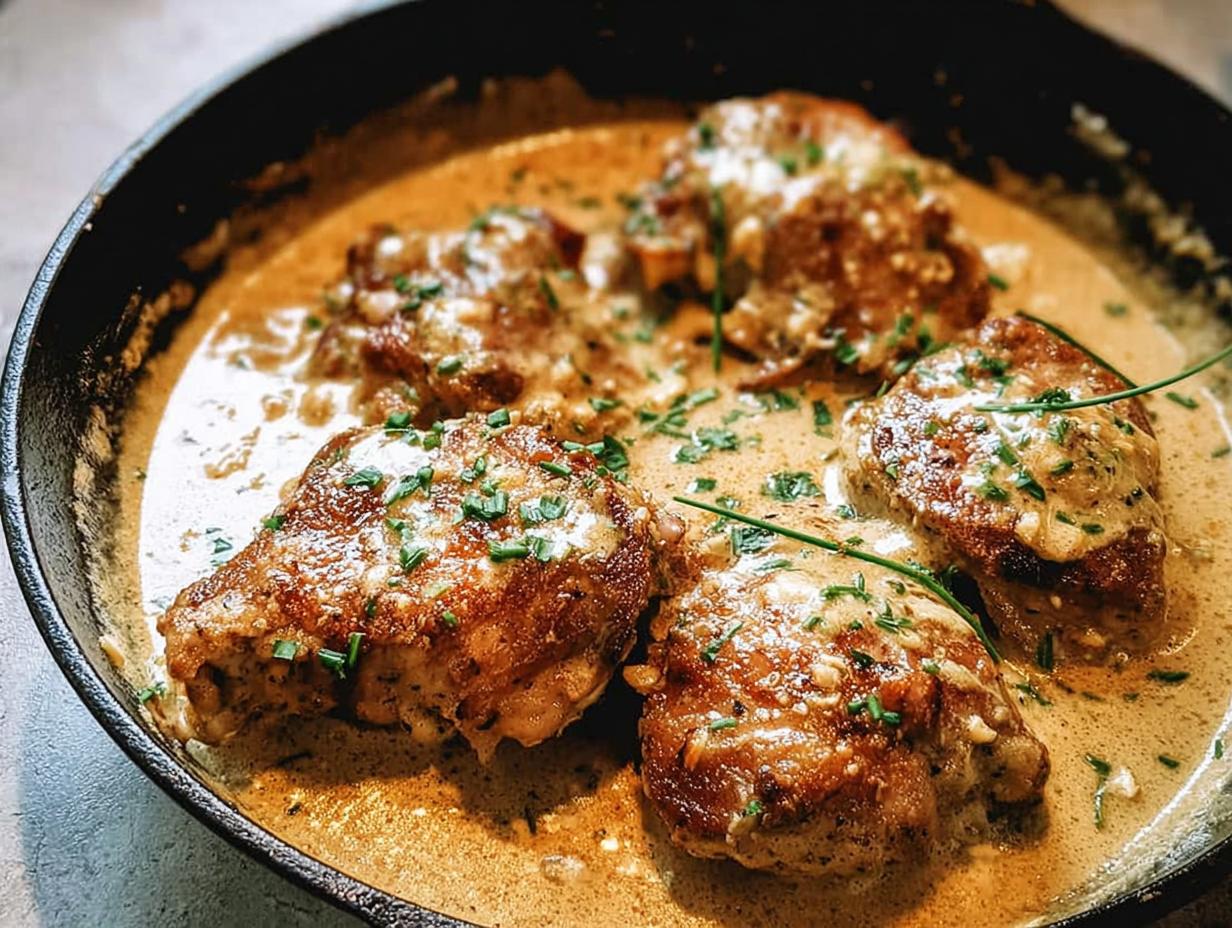
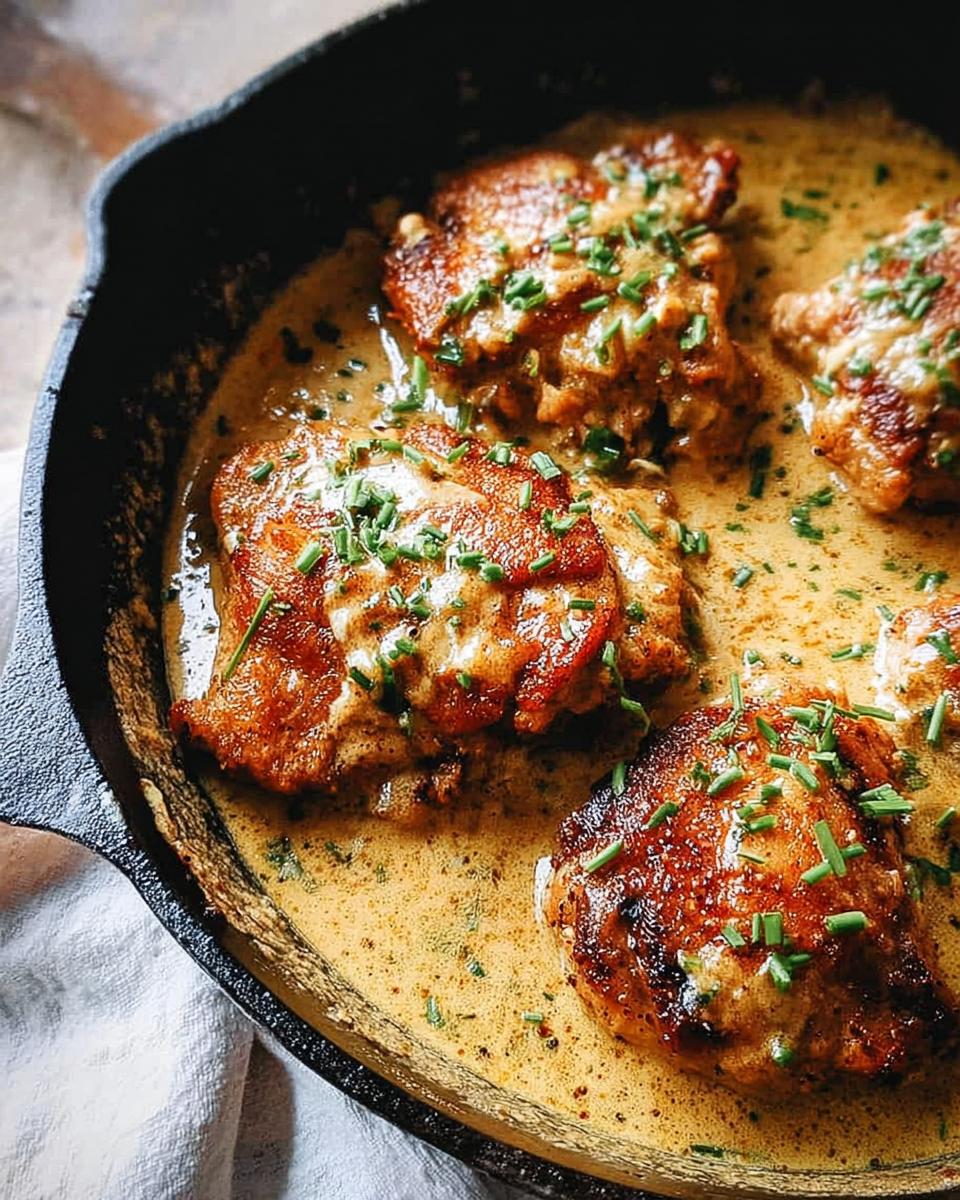
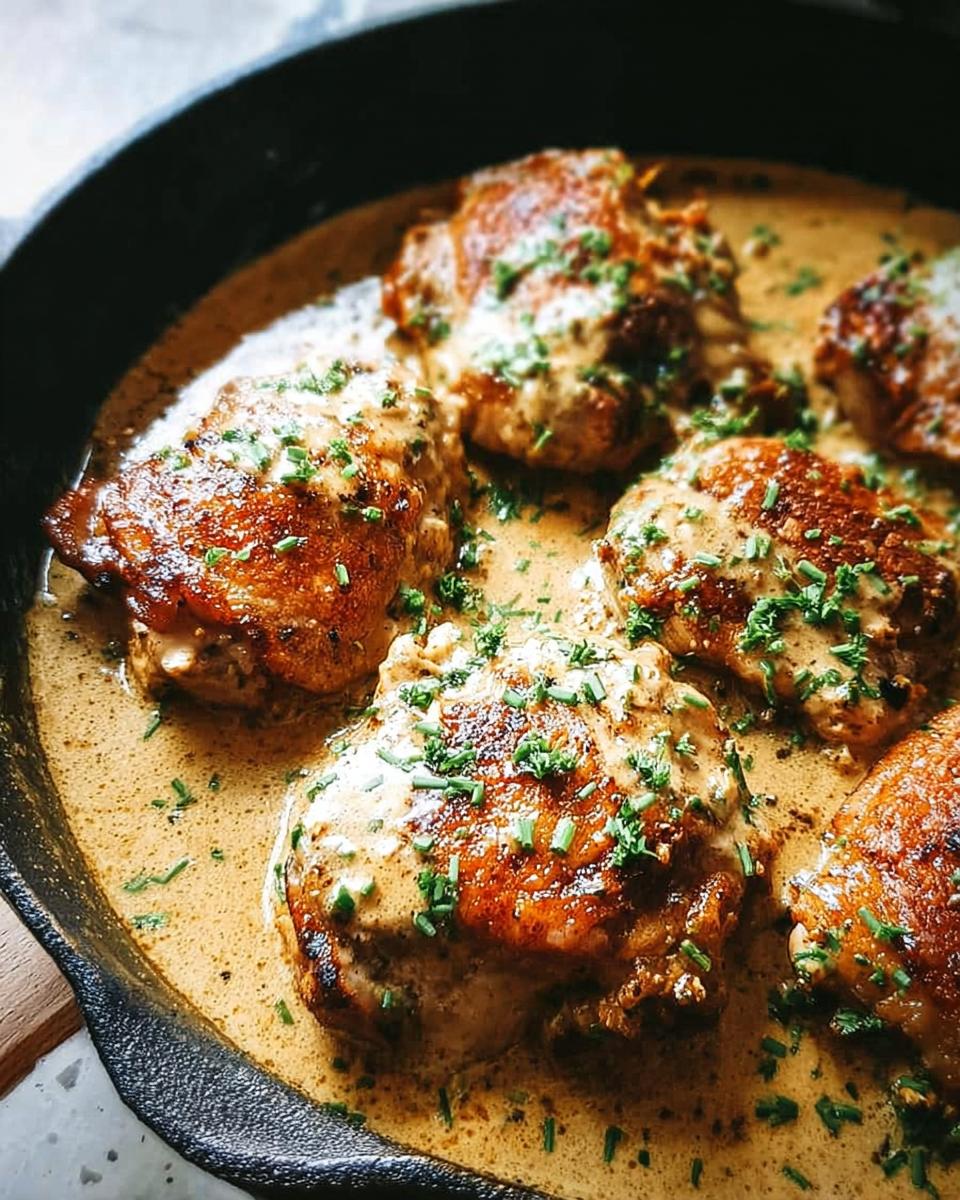
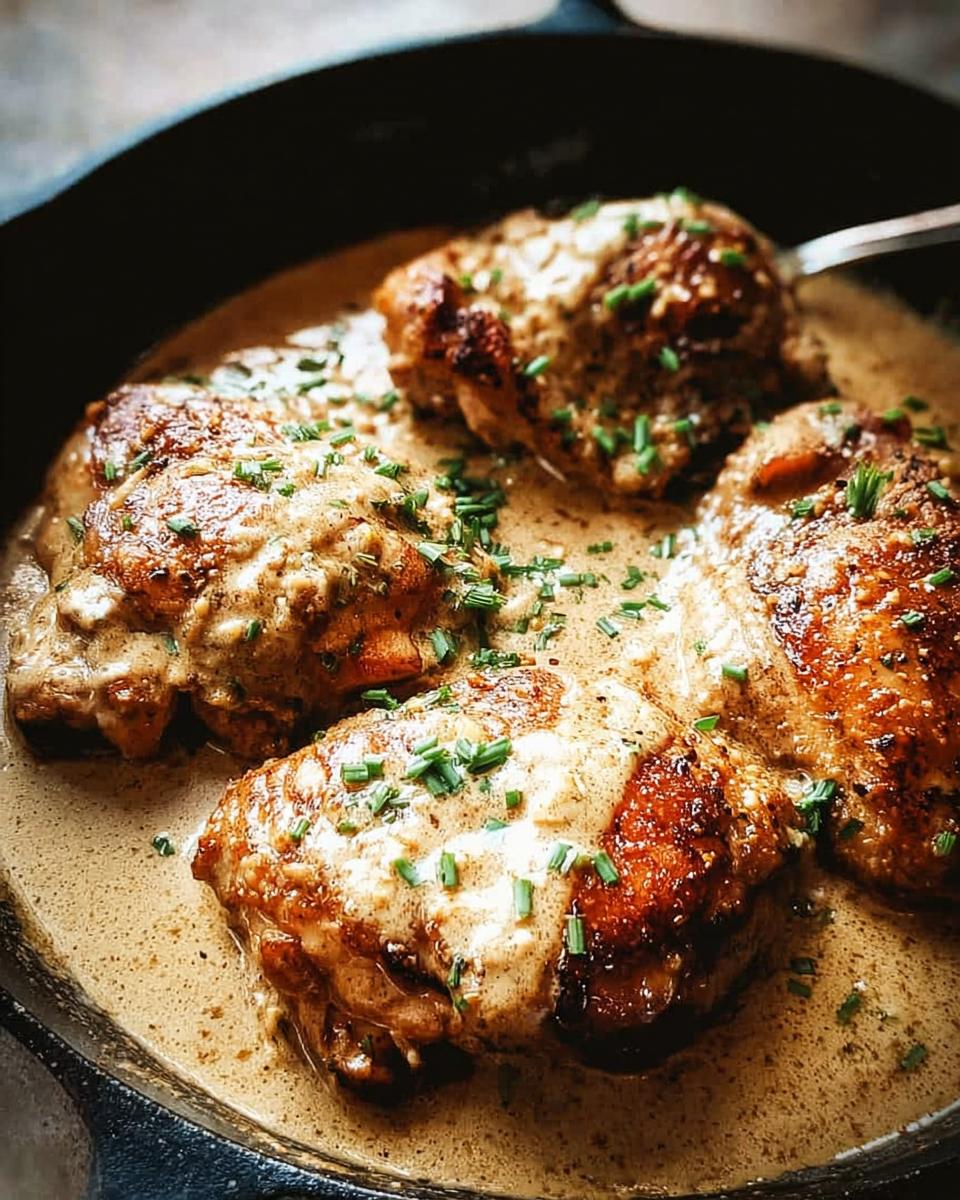
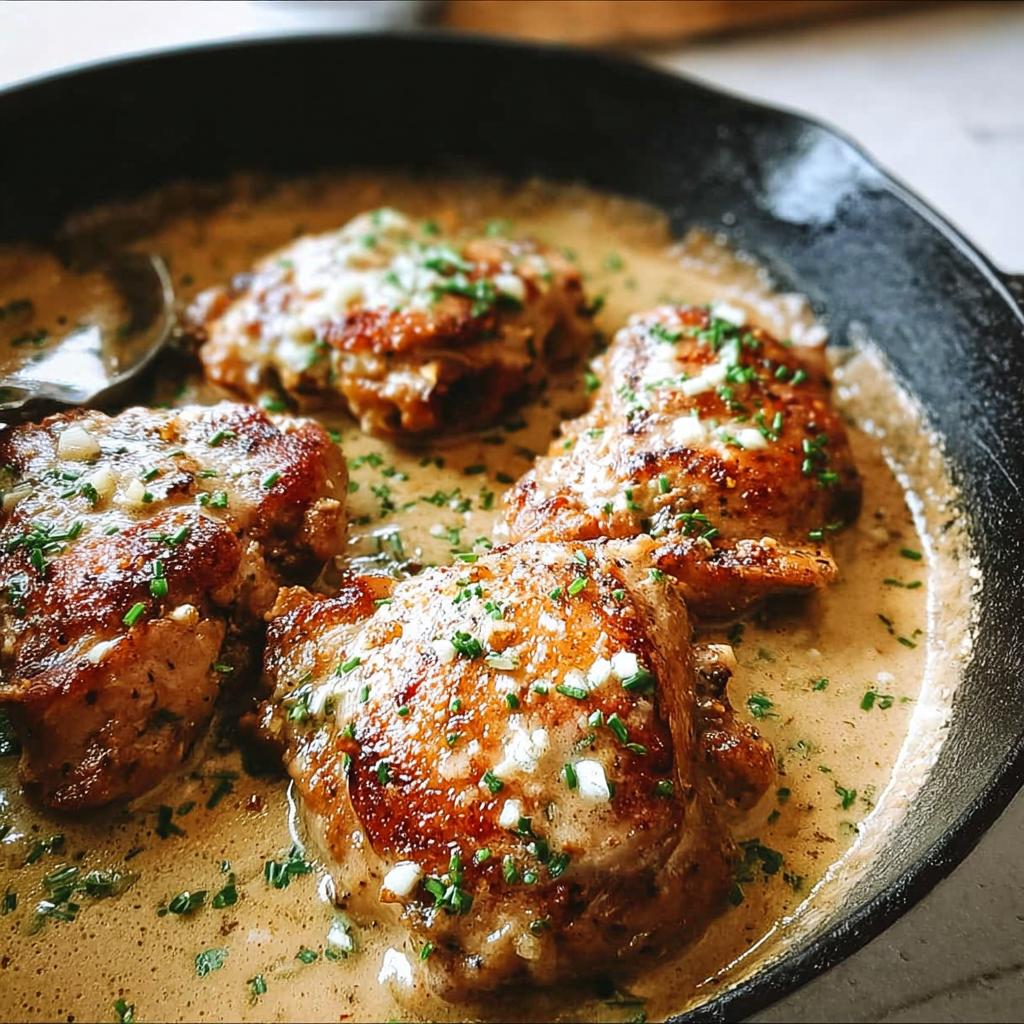
Almost there! Taste your glorious sauce and season it up with the remaining 1/2 teaspoon of salt and that pinch of pepper. Now, pour that beautiful sauce into the skillet you used for the chicken. Nestled those chicken thighs right into the sauce, skin-side up, and sprinkle everything with your chopped fresh chives. Serve it immediately while it’s hot and glorious!
Tips for Perfect Crispy Chicken Thighs Every Time
You know, getting that perfect crispy skin and juicy thigh isn’t rocket science, but there are a few little tricks that really make a difference. My biggest tip? Seriously, don’t skip patting the chicken dry! It’s the number one thing you can do to get that skin crackling. Also, make sure your pan is nice and hot before you add the chicken – we want to *sear* it, not steam it. If you’re worried about the sauce separating, just keep it low and slow when you add the butter, whisking constantly. Remember, chicken thighs are pretty forgiving, so don’t stress too much! For more tips on planning your meals around delicious chicken, you can check out this guide on how to create a low-carb meal plan. Little things like this make a big impact!
Meal Prep and Storage for Your Chicken Thighs
This crispy chicken thigh recipe is an absolute dream for meal prep! You can totally make the chicken and sauce ahead of time. Once everything has cooled down, store the chicken and sauce in separate airtight containers in the fridge. They’ll keep well for about 3 to 4 days. If you want to freeze them, the chicken will hold up okay, but the sauce might separate a bit upon thawing – just give it a good whisk! Reheating is super easy. You can gently warm the chicken and sauce in a saucepan over low heat, or pop them in the oven at around 300°F (150°C) until heated through. Just be aware the skin might not be quite as crispy after reheating, but it’ll still be incredibly delicious!
Frequently Asked Questions about Chicken Thighs
You know, cooking chicken thighs is pretty forgiving, but I get that you might have some questions when you’re just starting out! It’s totally normal to wonder about substitutions or how to get that perfect texture. Let’s tackle some common ones so you can feel totally confident in the kitchen.
Using Different Types of Chicken Thighs
So, this recipe calls for skin-on, bone-in thighs because that’s what gives us the best flavor and crispy skin, right? But hey, if all you have are boneless, skinless thighs, you can definitely still use them! Just know they’ll cook up much faster, and you won’t get that super crispy skin. You’ll want to shorten the cooking time quite a bit, so keep a close eye on them.
Troubleshooting Crispy Skin
The number one reason for not-so-crispy skin is moisture! Seriously, patting that chicken *super* dry before you season it is the biggest secret. Also, make sure your pan is nice and hot when you start, and don’t move the chicken around too much while it’s searing. Giving it space in the pan is key!
Ensuring Chicken is Cooked Through
The best way to know for sure is to use a meat thermometer. You’re aiming for an internal temperature of 175°F (79°C) in the thickest part of the thigh, away from the bone. Visually, the juices should run clear when you poke it with a fork or knife, and the meat should no longer be pink near the bone. If you did everything right, it’ll be juicy and perfectly cooked!
Nutritional Information
Just a heads-up, the nutritional info can change depending on the exact brands you use and how much sauce you ladle on! But, as a general idea, one serving of these glorious crispy chicken thighs with cream sauce usually comes in around 600-700 calories, with about 45-55g of fat (from that amazing butter and skin, of course!), a solid 35-45g of protein, and maybe 5-10g of carbs. It’s a decadent dish, for sure!
Share Your Culinary Creations!
Alright, my amazing cooks! I really hope you loved making these crispy chicken thighs. Seriously, tell me all about it! Did you try it? How did it turn out? Did you change anything? Drop a comment below and let me know your experience – I just love hearing from you! And if you snapped a pic, totally share it on social media and tag me; I promise I’ll be cheering you on from my kitchen! Or shoot me a message through my contact page.
Crispy Chicken Thighs with Cream Sauce
Ingredients
Equipment
Method
- Preheat your oven to 450 degrees F.
- Pat the chicken dry with paper towels. Sprinkle both sides with 1 1/2 teaspoons each of salt and pepper.
- Heat an oven-proof skillet over medium-high heat. Add the chicken thighs skin-side down. Cook until the skin is golden brown, about 11 to 12 minutes.
- Turn off the heat. Use tongs and paper towels to remove excess fat from the skillet. Repeat until only a thin film of oil remains.
- Transfer the skillet to the oven and roast for 6 to 8 minutes. Flip the thighs skin-side up and roast for another 6 minutes, or until no longer pink near the bone. Remove the chicken to a plate, skin side up. Wipe out the skillet.
- In a saucepan, combine vinegar, wine, shallots, lemon juice, and bay leaves. Simmer until reduced to a wet paste, 8 to 10 minutes. Add cream and simmer until reduced to about 2 tablespoons.
- Reduce heat to low and remove bay leaves. Add butter chunks one by one, whisking constantly until melted and emulsified. Continue until all butter is incorporated, about 4 minutes. Do not let the sauce exceed 130 degrees F.
- If the sauce separates, remove from heat, add 2 ice cubes, and whisk until it cools and comes back together.
- Season the sauce with 1/2 teaspoon salt and a pinch of pepper. Transfer the sauce to the cast iron skillet, place the chicken on top, and sprinkle with chives. Serve immediately.
Notes
Tried this recipe?
Let us know how it was!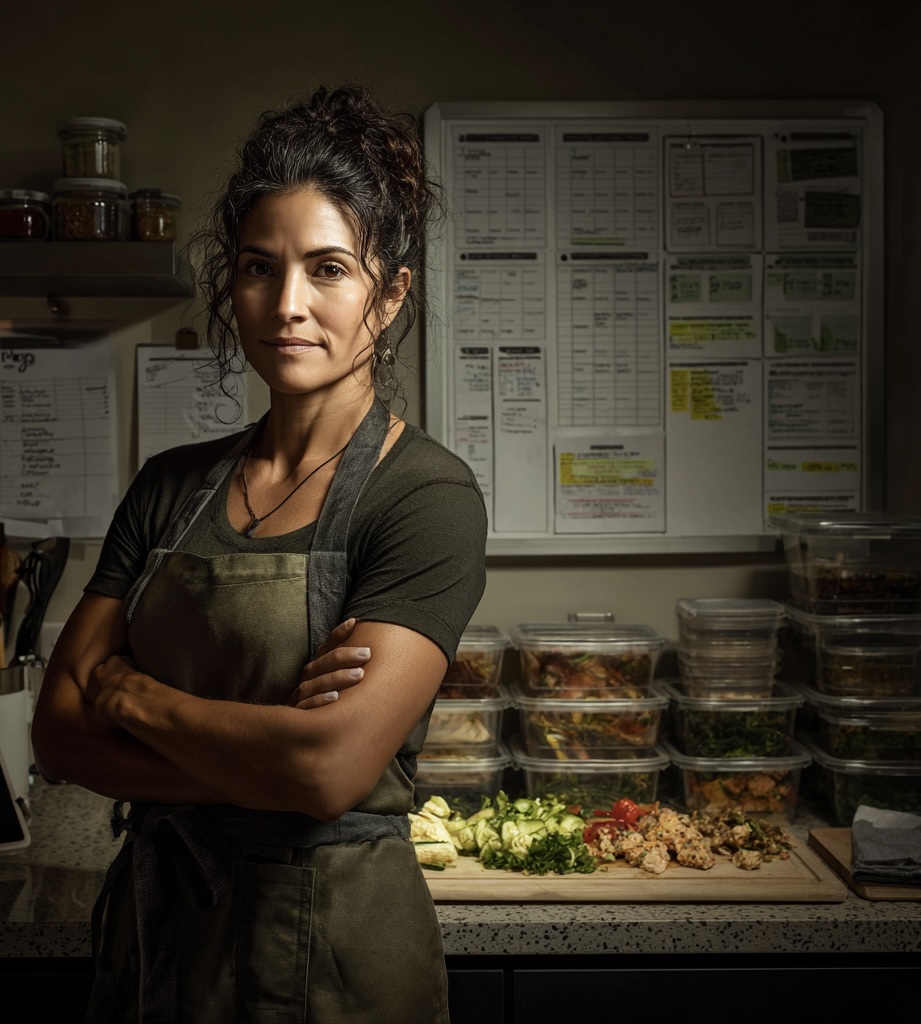
Master of Meal Planning Systems
My approach to meal planning comes from eight years as an Army quartermaster, coordinating food distribution for military bases housing thousands. I learned that feeding people successfully requires systematic thinking, resource optimization, and contingency planning that most home cooks never consider.
When my paramedic husband’s shift work collided with my demanding construction project management schedule, traditional dinner routines became impossible. Instead of surrendering to takeout chaos, I deployed the same strategic frameworks I’d used to feed entire battalions, scaling them down for busy families.
My signature “Battalion Batch System” transforms Sunday afternoons into precision operations. I’ve documented over 160 meal plans that account for variables most planners ignore: spoilage rates by seasonal humidity, backup ingredient lists for supply disruptions, and rotation schedules that prevent family palate fatigue.
My expertise extends to corporate wellness programs and school district consulting, designing scalable low-carb systems for large operations. When I’m not doing competitive target shooting or planning my garden’s crop rotation for maximum food security, I’m proving that meal planning isn’t about inspiration – it’s about infrastructure. Build reliable systems, and good nutrition becomes automatic rather than accidental.