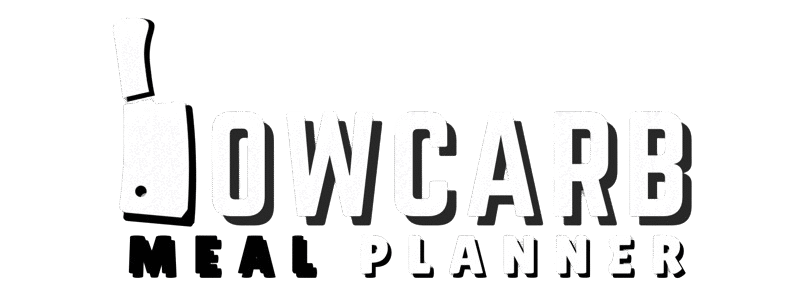
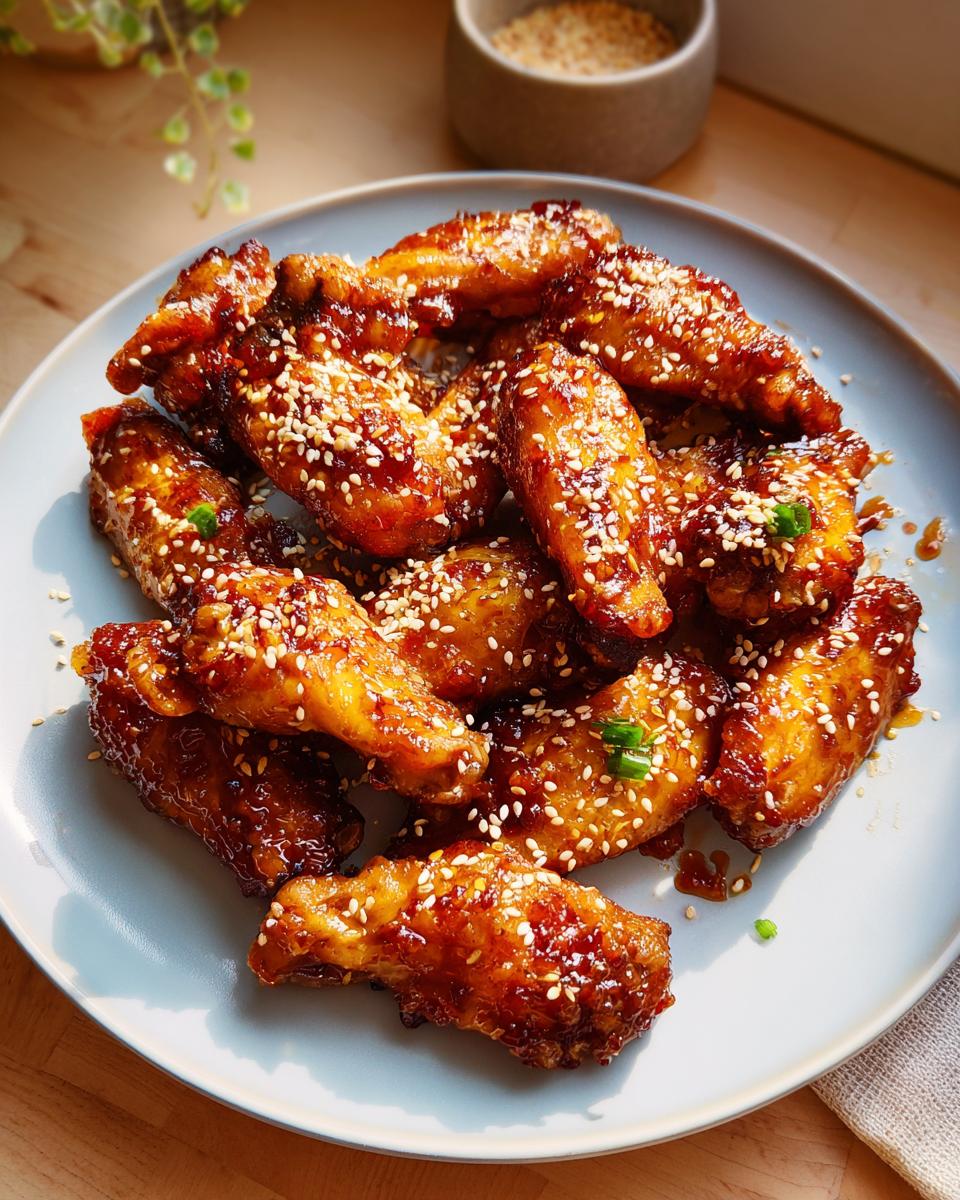
Okay, let’s talk chicken wings! If you’re anything like me, you love juicy, flavorful wings, but the thought of making them *delicious* for meal prep can be a little daunting. Well, guess what? I’ve cracked the code, and I’m so excited to share these Honey Soy Garlic Chicken Wings with you. These are the kind of Chicken Wings Recipes Meal Prep That Actually Tastes Great you’ll be dreaming about. Forget soggy, sad wings; these are crispy, sticky, and packed with that amazing sweet and savory flavor. I’ve made batches of these so many times, tweaking until they were *just* right, and trust me, they are absolute winners every single time!
Why You’ll Love These Chicken Wings Recipes Meal Prep That Actually Tastes Great
Honestly, these wings are a game-changer. Here’s why you’ll be obsessed:
- Unbeatable Flavor: That honey soy garlic combo is just divine. Sweet, savory, a little sticky – perfection!
- Seriously Crispy: No soggy bottoms here, folks! The prep steps make sure you get that satisfying crunch.
- Super Easy: Minimal fuss, maximum flavor. You can whip these up without breaking a sweat.
- Perfect for Meal Prep & Game Day: They hold up beautifully for lunches all week and are always a crowd-pleaser when friends come over.
Gather Your Ingredients for Honey Soy Garlic Chicken Wings
Alright, let’s get our kitchen prepped! Having everything ready before you start makes this whole wing-making process so much smoother, almost like magic. Trust me, it makes a world of difference.
For the Chicken Wings:
- About 2.5 pounds of chicken wings – that’s usually around 24 pieces. You can ask your butcher to cut them up if you prefer!
- 1/4 cup of all-purpose flour just to help get them nice and crispy. (Or use gluten-free flour if that’s your jam!)
- Sea salt and black pepper, of course! We’ll season them to perfection.
- A little spray of olive oil or avocado oil.
For the Sauce:
- 1/2 cup of honey – this is for that lovely sweetness.
- 1/3 cup of soy sauce – it adds that amazing savory depth. (Coconut aminos are a great substitute if you’re avoiding soy!)
- 4 cloves of garlic, mashed up. Don’t skip this!
- 2 tablespoons of fresh ginger, grated. It gives it a little zing.
- 1 tablespoon of tapioca flour (or arrowroot starch, or corn starch) to thicken everything up.
- 1/2 teaspoon of crushed red pepper flakes – just a little kick, totally optional if you’re sensitive to spice.
For Garnishing (Optional, but pretty!):
- A tablespoon of sesame seeds. Adds a nice little crunch and looks so professional!
Step-by-Step Guide to Making Crispy Chicken Wings
Okay, once you’ve got all your goodies assembled, it’s time to get down to business! Making these wings is honestly way simpler than you might think, and the payoff is HUGE. Just follow these steps, and you’ll have a batch of absolutely glorious wings in no time. If you want to see a similar fan-favorite recipe, this honey garlic chicken wing recipe is also fantastic and gives you that perfect sticky glaze!
Prepping the Wings for Maximum Crispiness
First things first, oven prep! Crank that oven up to 425°F. Now, for the real secret to crispy wings: dryness! Pat those chicken wings *super* dry with paper towels. Seriously, get them as moisture-free as possible. Then, toss ’em in a bowl with the flour, a good pinch of sea salt, and plenty of black pepper until they’re all coated. This little flour coating is what helps create that amazing crispy skin.
Baking and Broiling for Perfect Texture
Next up, get those seasoned wings onto a baking sheet lined with foil and parchment paper – trust me, cleanup will be a breeze! Give them a quick spray with your oil. Now, bake ’em for 30 minutes. After that, flip them over and bake for another 20 minutes. This is where the magic really happens: turn on your broiler for just the last 2 minutes. Keep a super close eye on them during this part, because they can go from golden brown to burnt in a heartbeat! This little broil blast gives them that gorgeous, slightly charred finish.
Crafting the Flavorful Honey Soy Garlic Sauce
While those wings are doing their thing in the oven, let’s whip up that incredible sauce. Grab a small saucepan and dump in all your sauce ingredients: the honey, soy sauce (or coconut aminos, your choice!), mashed garlic, grated ginger, tapioca flour (or your starch of choice), and those red pepper flakes if you’re feeling a little spicy. Whisk it all together and then heat it over medium heat. Stir it for about 6-7 minutes until it thickens up nicely into a syrupy glaze. Then, just take it off the heat and set it aside. Easy peasy!
Combining Wings and Sauce for Ultimate Flavor
Once your wings are done baking and have had their fiery broil moment, take them out of the oven. Now for the best part! Pour that luscious honey soy garlic sauce all over those hot wings. Use your tongs to toss them around gently until every single wing is beautifully coated in that sticky, flavorful glaze. If you’re using them, sprinkle on those toasted sesame seeds for an extra bit of flair. Serve them up right away and just watch everyone go wild!
Tips for Successful Chicken Wings Meal Prep
Okay, so you’ve made these amazing honey soy garlic wings, and now you want to make sure they taste just as incredible later in the week for meal prep? I totally get it! It’s one of my favorite things to have ready for a quick lunch. The key is how you store and reheat them. Store the cooled wings in an airtight container in the fridge for up to 3 days. Honestly, they stay pretty darn good! If you want them to be truly amazing for your weekdays, I highly, highly recommend reheating them in an oven or an air fryer. That’s what brings back that awesome crispy texture we worked so hard for. Microwaving can sometimes make things a bit… well, rubbery, and we definitely don’t want that for these chicken wings recipes meal prep that actually tastes great!
Also, if you’re prepping a big batch, consider keeping the sauce separate until you’re ready to eat for the absolute best crispiness. But if you’re like me and want it all ready to go, just know the oven or air fryer will be your best friends for reheating. It’s all about maximizing that flavor and texture, even when you’re on a tight schedule. Check out these quick keto hacks too; they might give you even more ideas for streamlining your prep!
Ingredient Notes and Substitutions for Your Chicken Wings
Let’s chat about some of these ingredients for a sec! Sometimes specific things can sound a little fussy, but I promise they’re easy to find or swap out. For the flour, if you’re keeping it gluten-free, no worries at all! Just grab your favorite gluten-free blend, and it works like a charm. And that soy sauce? If you’re not a fan or need to avoid gluten, coconut aminos are a fantastic substitute. They give you that lovely savory, umami flavor without the soy. For the oil, olive oil is great, but if you want something with a higher smoke point for really crispy wings, avocado oil is my go-to. Honestly, any neutral oil you have on hand will do the trick!
Frequently Asked Questions About These Chicken Wings Recipes
Got questions about these Honey Soy Garlic wings? I’ve got answers! Let’s dive into some common things people ask, so you can make these the best chicken wings recipes meal prep that actually tastes great.
Can I make these wings in an air fryer?
Oh, absolutely! Air fryers are fantastic for getting wings super crispy. You’ll want to cook them at around 380°F (190°C) for about 20-25 minutes, flipping them halfway through, until they’re golden and cooked through. Once they’re done, give them a good toss in that yummy honey soy garlic sauce. They’re perfect for a quick snack or even a super-fast game day treat!
How long do these wings last in the fridge?
These wings are pretty sturdy when it comes to meal prep. You can store them in an airtight container in the refrigerator for up to 3 days. I’ve found they hold up really well, and honestly, reheating them properly is key. Like I mentioned before, use your oven or an air fryer for the best results to bring back that delicious crispiness!
Are these chicken wings good for game day?
Are you kidding? These wings were practically *born* for game day! They’re incredibly flavorful, easy to eat while you’re watching the game, and they always disappear fast. The sticky honey soy garlic glaze makes them irresistible. You can even make a big batch ahead of time and just reheat them before kickoff. Definitely a winner for any football Sunday or any get-together!
My wings didn’t get super crispy, what did I miss?
Don’t worry, it happens! The biggest culprit is usually moisture. Make sure you’re really patting those wings as dry as possible before you toss them with the flour and seasonings. Also, don’t overcrowd the baking sheet! Giving them space helps hot air circulate, which is crucial for crispiness. If you’re using parchment, ensure it’s not bunching up. And that broil step? It’s quick but mighty for adding that extra layer of crisp!
Estimated Nutritional Information
Just to give you a rough idea, a serving of these delicious honey soy garlic chicken wings (about 4 wings) will likely clock in around 350-400 calories. You’ll get a good dose of protein, probably about 25-30 grams, with maybe 20-25 grams of fat and around 15-20 grams of carbs (mostly from the honey and soy sauce). Keep in mind, these are just estimates, and your mileage might vary a bit depending on exactly what brands you use and how generous you are with that sauce!
Share Your Delicious Creations
Okay, I’ve spilled all my secrets for these amazing honey soy garlic wings! Now it’s your turn. Have you tried making them? I’d absolutely LOVE to hear what you thought! Drop a comment below and let me know how they turned out, or if you tweaked them at all. And if you snap a pic, tag me on social media – I love seeing your kitchen creations! You can also reach out via my contact page if you have any questions.
Honey Soy Garlic Chicken Wings
Ingredients
Equipment
Method
- Preheat your oven to 425 F.
- Dry the chicken wings very well with a paper towel. This is key to making them crispy.
- Add the dried wings to a bowl with the flour, sea salt, and black pepper. Toss each wing until fully coated.
- Transfer the coated wings to a foil or parchment paper lined baking sheet. You can layer foil and parchment paper for easier cleanup. You might need multiple baking sheets depending on wing size.
- Spray the wings with oil and bake for 30 minutes. Flip the wings and bake for an additional 20 minutes.
- While the wings bake, prepare the sauce. Add all sauce ingredients to a small saucepan or pot.
- Heat the sauce mixture over medium heat, stirring for 6-7 minutes until thickened. Remove from heat and set aside.
- After the wings have baked for 20 minutes, turn the broiler on for 2 minutes to achieve a brown color. Watch carefully to prevent burning.
- Remove the wings from the oven.
- Pour the sauce over the wings and use tongs to coat them evenly.
- Top with sesame seeds if desired, serve, and enjoy.
Notes
Tried this recipe?
Let us know how it was!
James Richardson – Certified Budget Nutrition Economist
My expertise in affordable low-carb eating was born from necessity during graduate school, when ramen noodles threatened to derail both my metabolism and my economics dissertation. Later, feeding a family of five on a teacher’s salary while my wife completed nursing school taught me that eating well doesn’t require a trust fund.
With my MBA in consumer behavior analytics, I treat grocery budgets like investment portfolios. My breakthrough “Dollar-Per-Day Keto” challenge proved sustainable low-carb eating could be achieved for under $30 weekly per person through strategic bulk purchasing and what I call “ingredient arbitrage” – buying versatile basics when they’re cheapest.
I’ve developed over 200 budget-optimized recipes with real-time pricing calculations that adjust based on regional grocery data. Unlike lifestyle bloggers who assume unlimited budgets, my meal plans work with food stamp restrictions, dollar store ingredients, and the reality that consistent access to “right” foods often determines dietary success.
My background as a budget coordinator for a regional food bank taught me how economic constraints intersect with nutritional needs. When I’m not playing competitive chess or collecting vintage calculators, I’m proving that nutrition becomes a luxury only when you approach it backwards – optimize for value instead of convenience, and eating well becomes the most economical choice.