
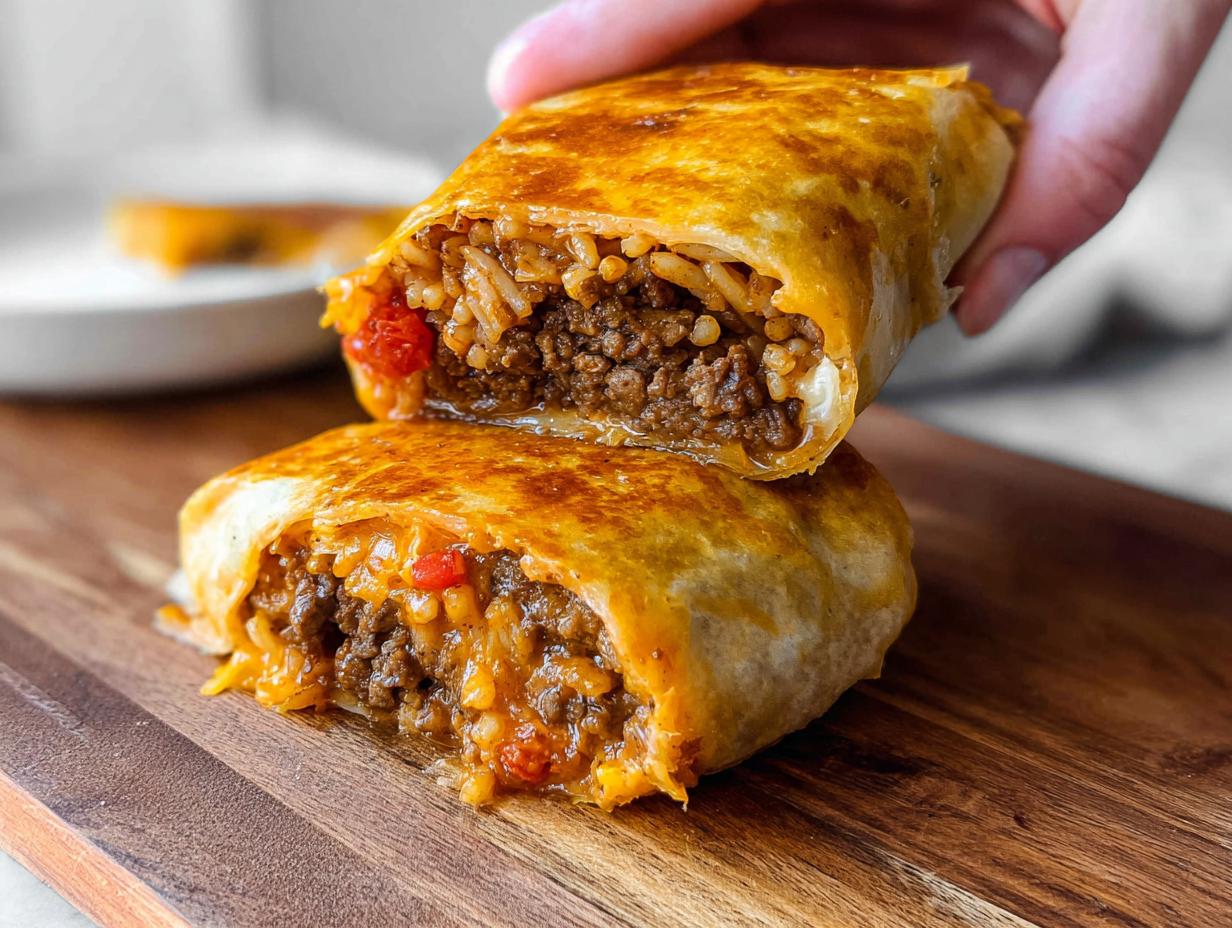
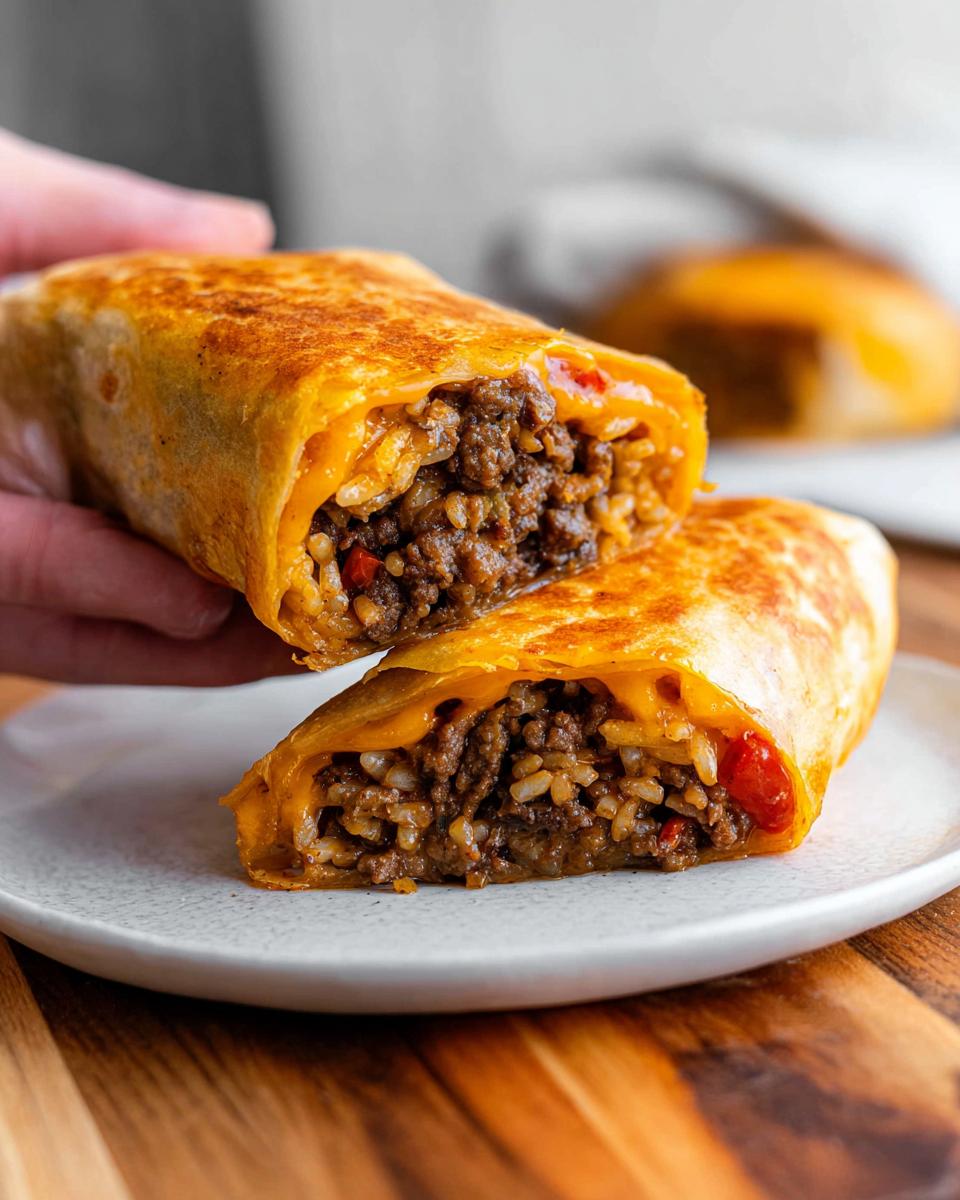
Oh, who *doesn’t* love a good cheesy, melty, downright comforting meal? But sometimes, those cravings hit when you’ve got zero time and maybe just a few odds and ends in the fridge. That’s exactly how my Grilled Cheese Burrito Made Easy journey began! My kids were practically bouncing off the walls on a lazy weekend, and all I had was some cooked ground beef, a bit of rice, and a whole lotta cheese. I threw it all together into a tortilla, slapped it in the skillet, and BAM! Pure magic. This recipe is my little secret for turning simple ingredients into a crispy, gooey, incredibly satisfying burrito that feels like a hug in every bite. It’s all about making that epic grilled cheese experience into a super easy, family-friendly burrito, without any fuss.
Why You’ll Love This Grilled Cheese Burrito Made Easy
This isn’t just another recipe; it’s your new go-to for seriously satisfying meals!
- Super Quick: Seriously, from start to finish, this is faster than ordering takeout. Perfect for busy weeknights or lazy weekends.
- Incredibly Easy: I took all the guesswork out. You’ll be amazed at how simple it is!
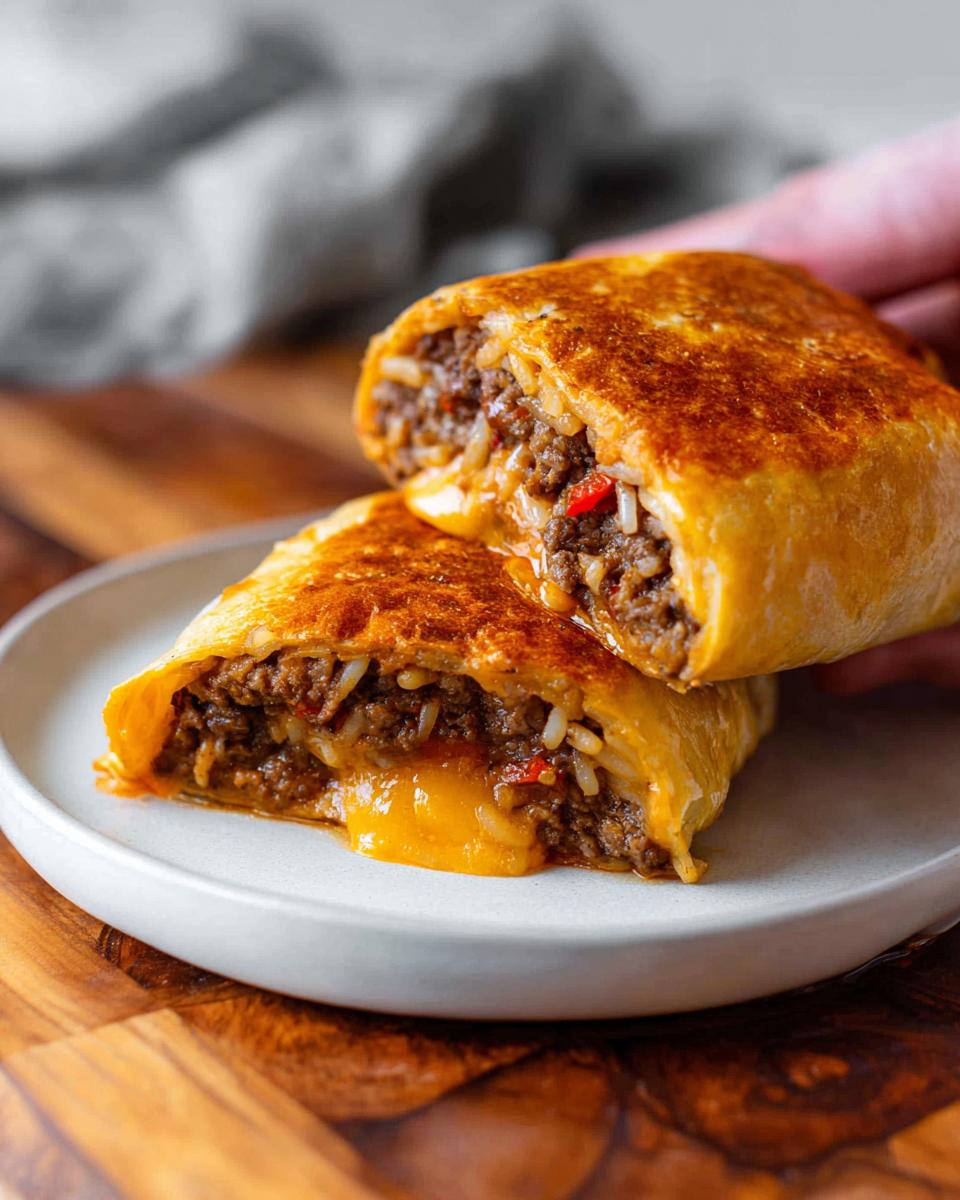
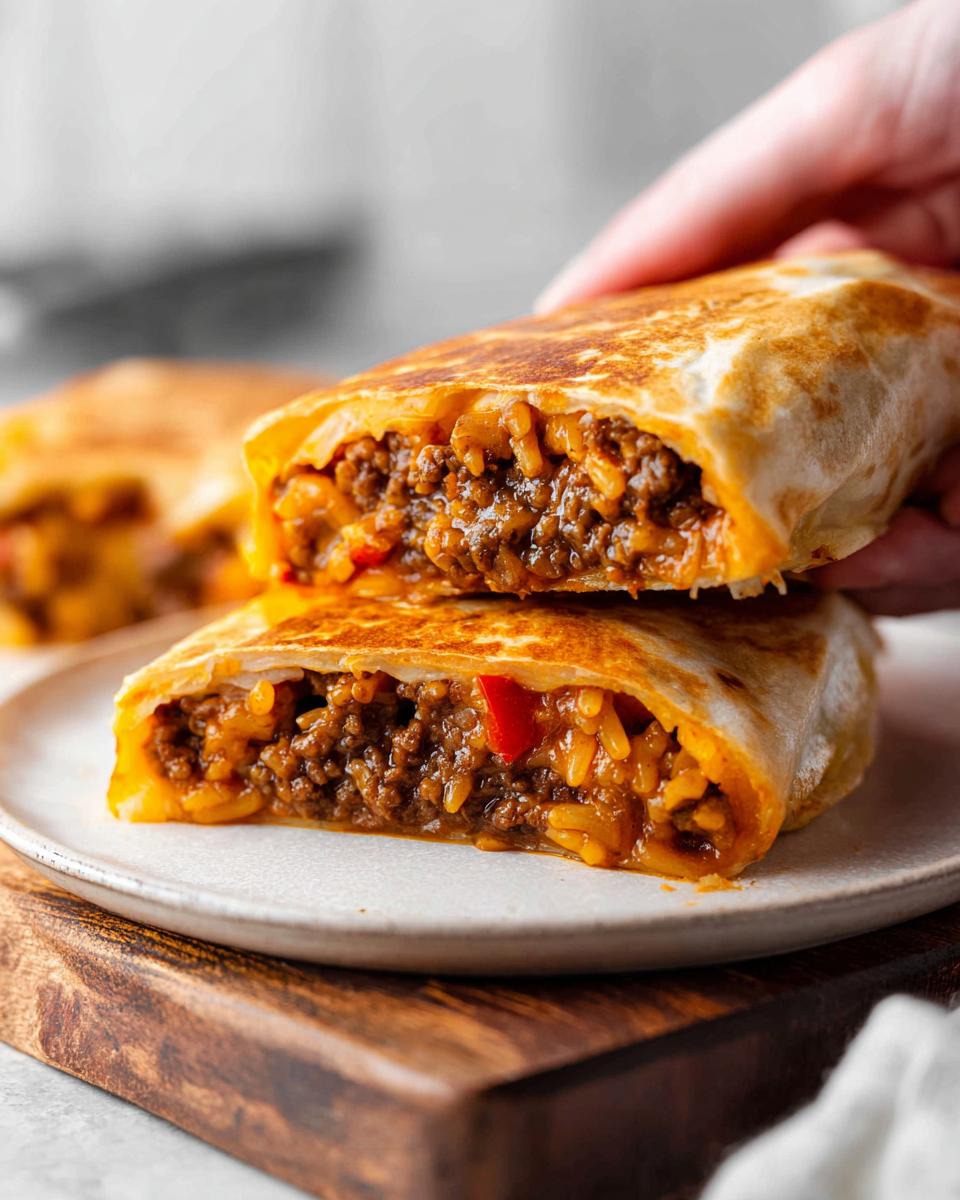
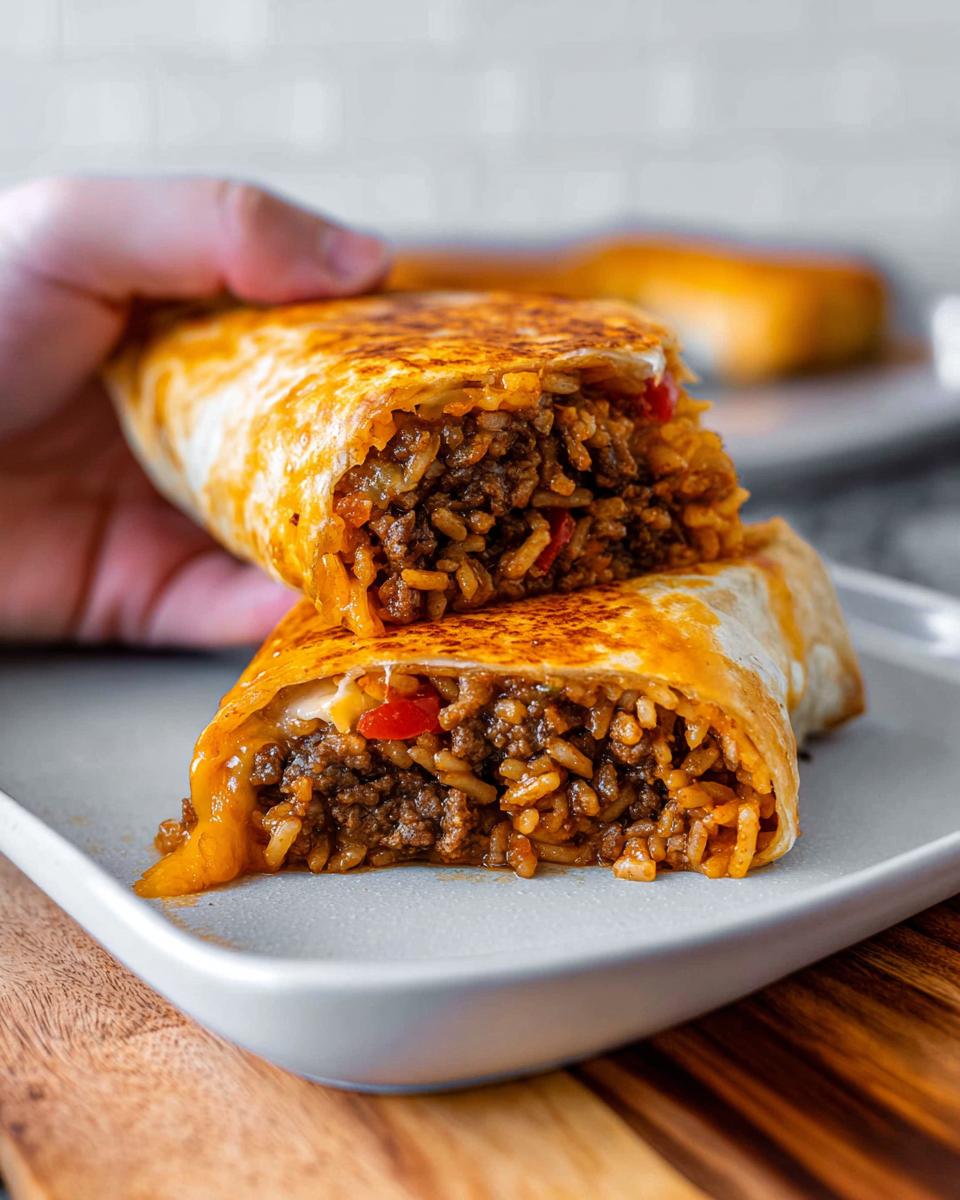
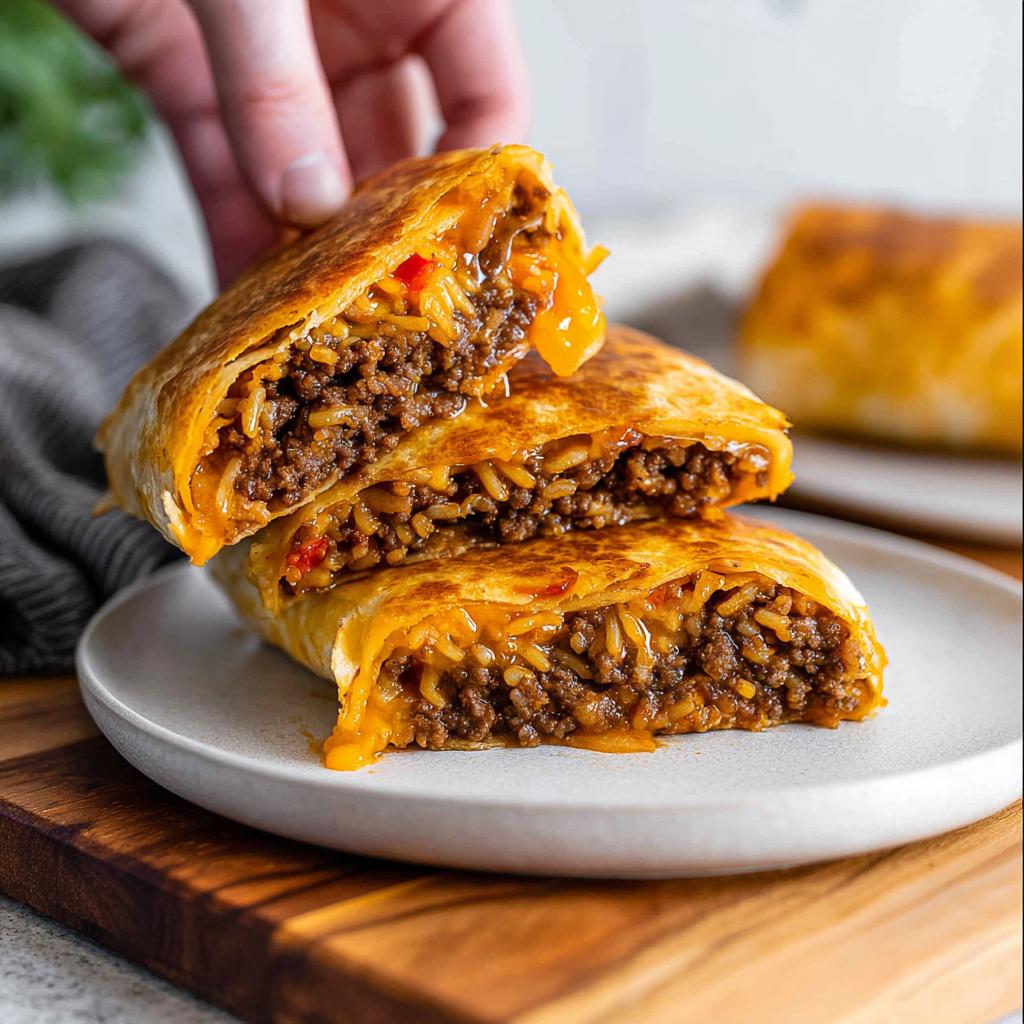
- Cheesy Perfection: We’re talking a golden-brown, crispy exterior with a melty, gooey cheese and savory filling inside. Pure comfort food bliss!
- Uses What You Have: Great for using up leftovers and pantry staples.
- Family Approved: Kids and adults alike gobble these up. It’s a crowd-pleaser, guaranteed!
Ingredients for Your Grilled Cheese Burrito Made Easy
Alright, let’s talk about what you’ll need to whip up this amazing Grilled Cheese Burrito Made Easy. It’s all about simple things you probably already have!
Seasoned Beef
- 1 lb 85/15 ground beef
- 1 teaspoon granulated garlic
- 0.5 teaspoon chili powder
- 0.5 teaspoon salt
- 0.25 teaspoon pepper
Chipotle Sour Cream
- 1 cup sour cream
- 1 tablespoon chipotle hot sauce
- 0.25 teaspoon cayenne pepper
Other Ingredients
- 1 cup cooked spanish rice (I just used one of those microwave pouches, super easy!)
- 3 cups shredded cheddar jack cheese (make sure it’s separated!)
- 1 cup red tortilla strips (these add a nice little crunch!)
- 2-3 tablespoons olive oil
- 4 extra large burrito tortillas (you really need the big ones!)
See? Nothing too fancy! These ingredients are the foundation for pure cheesy perfection. If you’re looking for some other easy dinner ideas, you should totally check out this keto hamburger skillet – it’s another quick win!
Essential Equipment for Making Your Grilled Cheese Burrito
You don’t need a fancy kitchen for this one! Just grab a couple of things:
- A large nonstick skillet
- A good ol’ mixing bowl
- And my favorite for getting that perfect crispy crust, a cast iron skillet!
Step-by-Step Instructions for the Grilled Cheese Burrito Made Easy
Okay, get ready to make some magic happen! These steps are super straightforward, so you’ll have your amazing Grilled Cheese Burrito Made Easy ready in no time. Trust me, it’s worth every second!
Preparing the Seasoned Beef
First things first, we’ve got to get that beef seasoned up right. Grab your large nonstick skillet and pop it over medium heat. Toss in your ground beef and break it up with your spoon. Now, sprinkle in that minced garlic, chili powder, salt, and pepper. Let it all cook together until the beef is totally done, about 5 to 7 minutes. Once it’s cooked through, just scoop it out and set it aside. Easy peasy!
Making the Chipotle Sour Cream
Next up, let’s whip up that zesty chipotle sour cream! Grab a bowl, pour in your sour cream, add the chipotle hot sauce, and a pinch of cayenne pepper. Mix it all up until it’s nice and combined. This little mixture adds a fantastic kick!
Assembling Your Grilled Cheese Burrito
Now for the fun part: assembling your Grilled Cheese Burrito! In a big bowl, put about a quarter pound of your seasoned beef. Add in a quarter cup of that chipotle sour cream, a quarter cup of rice, half a cup of cheese, and a quarter cup of those crunchy tortilla strips. Gently fold everything together until it’s nicely mixed. Spoon this yummy filling into the middle of your giant burrito tortilla. Then, fold in two sides like you’re tucking it in, and roll it all up snugly into a burrito shape. You can find out more about how to make a great low-carb meal plan here, too!
Grilling the Burrito to Perfection
Time to get it nice and crispy! Put that same large nonstick skillet back on medium-high heat. Add a teaspoon or two of olive oil. Once the oil is shimmering and smells good, add about a quarter cup of shredded cheese right in the middle of the pan in a line. Immediately place your assembled burrito right on top of that cheese line. Now, carefully put a heavy cast iron skillet on top of the burrito – this is the secret to that amazing grilled cheese crust! Let it cook for about 3 to 4 minutes until the bottom cheese is melty and golden brown. Carefully remove the cast iron skillet, give your burrito a flip, and grill the other side for another 2 to 3 minutes until it’s perfectly browned. Repeat all these steps for the remaining burritos. You can see another version here!
Let them rest for just a minute before you dive in. You deserve it!
Tips for the Ultimate Grilled Cheese Burrito Made Easy
Alright, you’ve got the recipe, but let’s toss in a few little tricks to make your Grilled Cheese Burrito Made Easy absolutely sing! It’s all about those little details that make a huge difference. First off, don’t skimp on the tortilla size – seriously, grab those extra-large ones. They make rolling so much easier and prevent any messy blowouts. When it comes to cheese, using a blend that melts well is key, like that cheddar jack or even a mix with some Monterey Jack. And for that ultimate crispy, golden exterior? Don’t be shy with the olive oil, and definitely use a heavy pan like cast iron to get that perfect press. It’ll give you that satisfying crunch every single time. If you’re thinking about meal prepping, check out how to make a low-carb meal plan that actually works; it’s a lifesaver for busy folks!
Ingredient Notes and Substitutions for Your Burrito
Let’s talk a little bit about some of these ingredients, because little tweaks can make this recipe perfect for *you*! For the beef, 85/15 is my go-to for flavor, but you could totally use leaner ground turkey or even some finely crumbled cooked chicken if that’s what you have on hand. If chipotle hot sauce isn’t your jam, or you can’t find it, a dash of your favorite smoky hot sauce or even just a pinch of smoked paprika mixed into regular hot sauce gives a great flavor. And hey, if you want to try a vegetarian version? Some seasoned black beans or crumbled firm tofu would be fantastic in place of the beef. For more easy dinner ideas, check out this hamburger skillet – it’s another keeper!
Frequently Asked Questions About Grilled Cheese Burritos
Got questions about whipping up your own Grilled Cheese Burrito Made Easy? We’ve got answers! This is all about making your life simpler and your meals tastier. If you love easy, cheesy meals, you should totally check out these other easy cheesy burrito recipes, too!
Can I make the beef ahead of time?
Absolutely! Just cook the seasoned beef and let it cool completely. Store it in an airtight container in the fridge for up to 3 days. Reheat it gently on the stove or in the microwave before assembling your burritos.
What kind of tortillas work best for this Grilled Cheese Burrito?
For the best results with this Grilled Cheese Burrito, make sure you grab extra-large burrito-sized tortillas. They’re big enough to hold all that yummy filling and make rolling much easier, so you won’t have any gaps!
How do I prevent the burrito from falling apart?
A tight roll is key! Make sure to fold in the sides of the tortilla firmly before rolling it up snugly. Grilling it with a lid or pressing down with a heavy pan also helps seal everything together beautifully.
Can I make this a vegetarian Grilled Cheese Burrito?
You bet! Swap out the ground beef for seasoned black beans, crumbled firm tofu, or even a mix of roasted veggies like corn and bell peppers. Just make sure your filling is flavorful and not too wet!
Serving Suggestions for Your Cheesy Creation
This Grilled Cheese Burrito is pretty epic on its own, but why not take it up a notch? It’s amazing served with a dollop of extra chipotle sour cream on top, or maybe some fresh pico de gallo for a little brightness. If you want some sides, some simple tortilla chips and salsa are always a win, or check out these awesome veggie sides. So good!
Storing and Reheating Leftovers
So, you managed to save some of these gloriously cheesy delights? Smart move! If you happen to have any of these amazing burritos leftover, just let them cool down completely. Then, wrap each one up really well in plastic wrap or foil, or pop them into an airtight container. They’ll keep in the fridge for about 2-3 days. When you’re ready to enjoy them again, the best way to reheat is in a skillet over medium heat, maybe with a tiny bit of butter or oil, just like we did the first time. You can also pop them in the oven or an air fryer for a few minutes until they’re hot and crispy again!
Nutritional Information
Now, a little note on the numbers! These are just estimates, of course, because every kitchen is a little different. Based on my recipe, you’re looking at about 869 calories, 57g of fat, 45g of protein, and 44g of carbohydrates per burrito. There are also around 2g of fiber and 6g of sugar. For a more detailed breakdown or to learn how to create a meal plan that works for you, check out this guide!
Share Your Grilled Cheese Burrito Made Easy!
So, did you give this Grilled Cheese Burrito Made Easy recipe a whirl? I’d just LOVE to hear all about it! Did you try any fun substitutions, or did it become a family favorite just like it is in my house? Drop a comment below, give it a star rating if you loved it, or even better, share a pic on social media and tag me! You can get in touch with me here. Happy cooking!
Grilled Cheese Burrito Made Easy
Ingredients
Equipment
Method
- First, prepare the beef. Heat a large nonstick skillet over medium heat. Add the ground beef to the skillet and break the meat up. Sprinkle the granulated garlic, chili powder, salt, and pepper to the beef.
- Let the beef cook in the spices until it is fully cooked, 5-7 minutes.
- Remove the beef from the heat and set aside.
- Prepare the chipotle sour cream. Add the sour cream, chipotle hot sauce, and cayenne pepper to a bowl and mix until well combined. Set aside.
- Assemble a burrito. Add 1/4 pound of beef to a large bowl. Add 1/4 cup chipotle sour cream, 1/4 cup rice, 1/2 cup cheese, and 1/4 cup tortilla strips to the bowl. Fold the ingredients together until combined. Add the mixture to the middle of a tortilla. Then, fold in 2 sides and roll it into a burrito.
- Cook the burrito. Heat the same large nonstick skillet over medium/high heat. Add 1-2 teaspoons of olive oil to the skillet. When the olive oil is fragrant, add 1/4 cup cheese in the shape of a line in the center of the nonstick skillet and place the burrito on top of the cheese.
- Carefully place a heavy cast iron skillet on top of the burrito. Let the burrito cook with the cheese for 3-4 minutes or until the cheese melts and begins to brown.
- Remove the cast iron skillet from the burrito and carefully flip the burrito. Cook the burrito for an additional 2-3 minutes or until browned on the opposite side. Remove the burrito from the skillet.
- Repeat steps 5-7 until all 4 burritos are assembled and cooked.
- Let the burrito rest for 1 minute before serving.
Nutrition
Notes
Tried this recipe?
Let us know how it was!
James Richardson – Certified Budget Nutrition Economist
My expertise in affordable low-carb eating was born from necessity during graduate school, when ramen noodles threatened to derail both my metabolism and my economics dissertation. Later, feeding a family of five on a teacher’s salary while my wife completed nursing school taught me that eating well doesn’t require a trust fund.
With my MBA in consumer behavior analytics, I treat grocery budgets like investment portfolios. My breakthrough “Dollar-Per-Day Keto” challenge proved sustainable low-carb eating could be achieved for under $30 weekly per person through strategic bulk purchasing and what I call “ingredient arbitrage” – buying versatile basics when they’re cheapest.
I’ve developed over 200 budget-optimized recipes with real-time pricing calculations that adjust based on regional grocery data. Unlike lifestyle bloggers who assume unlimited budgets, my meal plans work with food stamp restrictions, dollar store ingredients, and the reality that consistent access to “right” foods often determines dietary success.
My background as a budget coordinator for a regional food bank taught me how economic constraints intersect with nutritional needs. When I’m not playing competitive chess or collecting vintage calculators, I’m proving that nutrition becomes a luxury only when you approach it backwards – optimize for value instead of convenience, and eating well becomes the most economical choice.