
Oh, the air fryer! If you’re just diving into the kitchen or looking to make weeknight dinners way less stressful, you’ve landed in the perfect spot. I remember my early days trying to get chicken just right – sometimes it was dry, sometimes the skin just wouldn’t crisp up, and don’t even get me started on the cleanup! That’s where the magical air fryer comes in. This isn’t just another kitchen gadget; it’s a game-changer, especially for beginners wanting perfectly cooked chicken every single time. Welcome to The Ultimate Air Fryer Chicken Recipes Guide for Beginners, where we’re going to make delicious, crispy chicken your new go-to meal!
Why This Air Fryer Chicken Guide is Perfect for Beginners
Okay, I get it. The idea of cooking chicken can feel a little… daunting. But trust me, once you get the hang of your air fryer, it becomes your absolute best friend in the kitchen, especially for chicken! Honestly, after years of experimenting and probably burning more than a few batches myself (oops!), I’ve found the air fryer is just pure magic for getting that perfect crispy skin and super juicy meat that everyone loves. It’s way faster than an oven, and way more forgiving. Plus, it means less mess and less stress, which is exactly what we beginners need, right? This guide is built to take all the guesswork out of it so you can feel like a total pro, starting with your very first attempt.
Crispy Skin, Juicy Inside: The Air Fryer Promise
We all dream of that perfectly cooked chicken, right? Golden, crispy skin that cracks just so, and meat that’s so tender and juicy you don’t even need a knife. That’s exactly what the air fryer does! It circulates hot air super-fast all around the chicken, giving it that incredible crunch without drying out the inside. It’s seriously a game-changer and makes you look like you slaved away for hours.
Essential Air Fryer Chicken Recipes for Beginners
Alright, let’s get down to the good stuff! When you’re just starting out, the idea of a whole chicken might sound a bit ambitious, but I promise, the air fryer makes it SO doable. This is truly the cornerstone of The Ultimate Air Fryer Chicken Recipes Guide for Beginners because it shows you just how easy it is to get amazing results. We’re talking tender, flavorful meat and that picture-perfect crispy skin, all without a fuss. It’s the perfect recipe to kickstart your air frying adventures and impress everyone, including yourself! You can even check out a similar recipe over at Allrecipes for inspiration.
Air Fryer Whole Chicken: Your First Step in The Ultimate Air Fryer Chicken Recipes Guide for Beginners
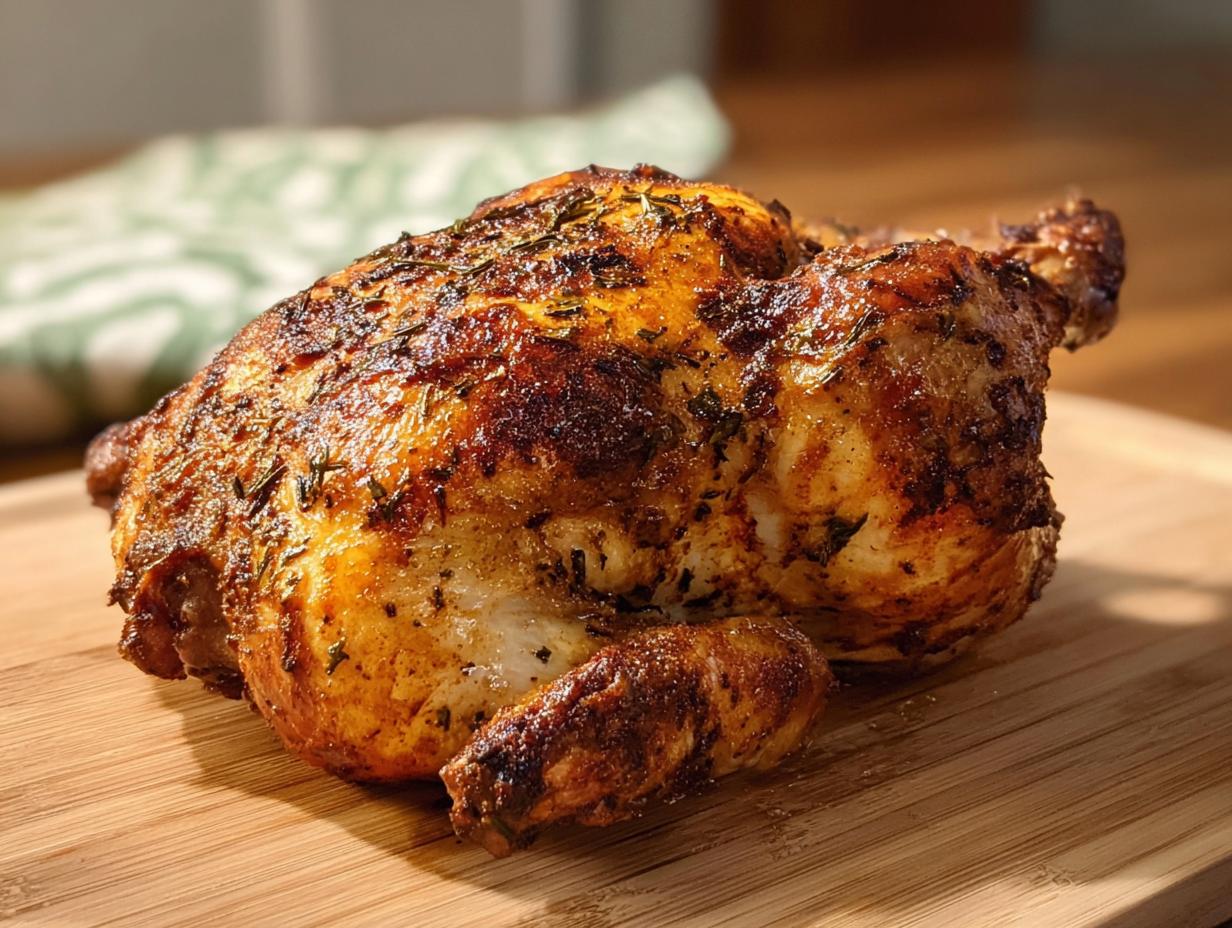
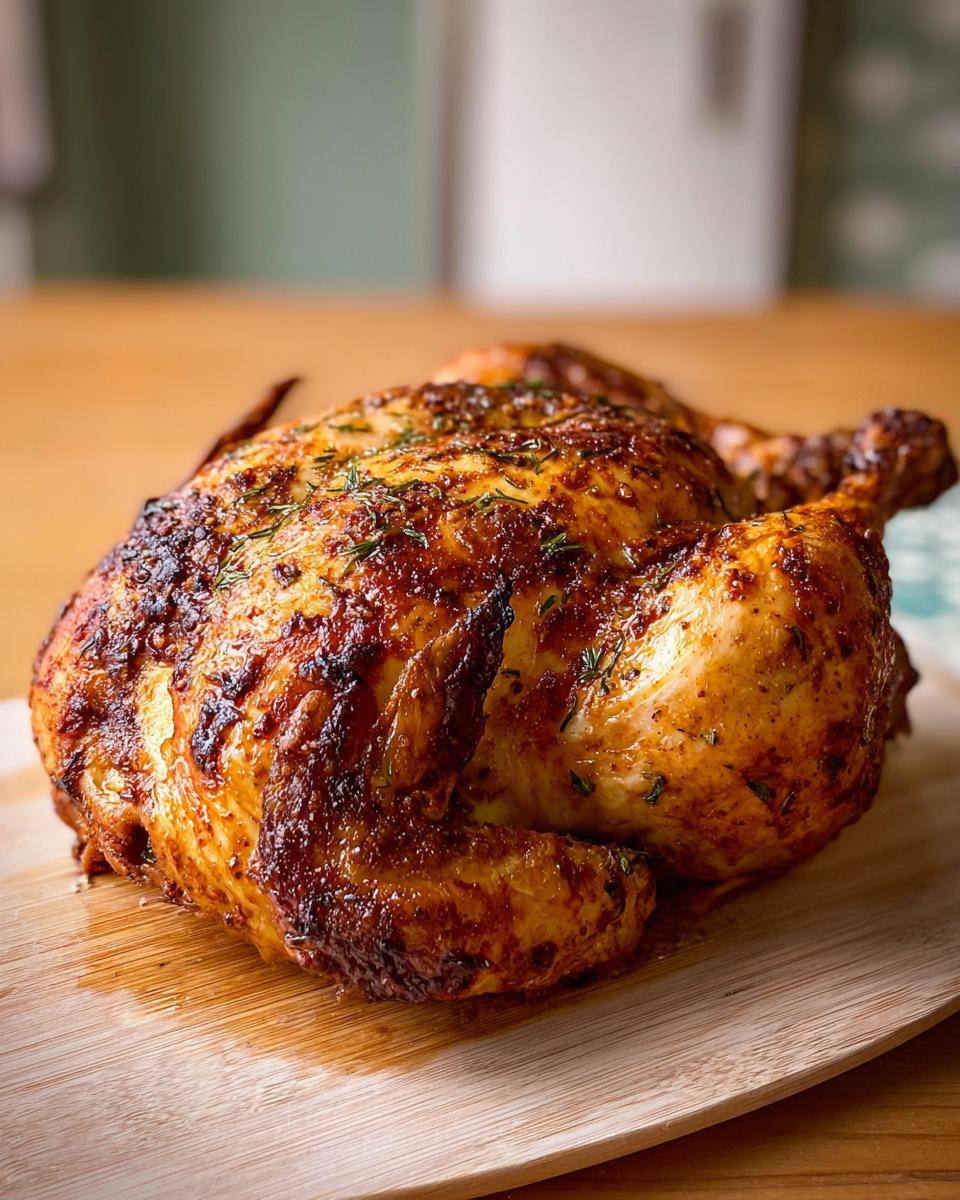
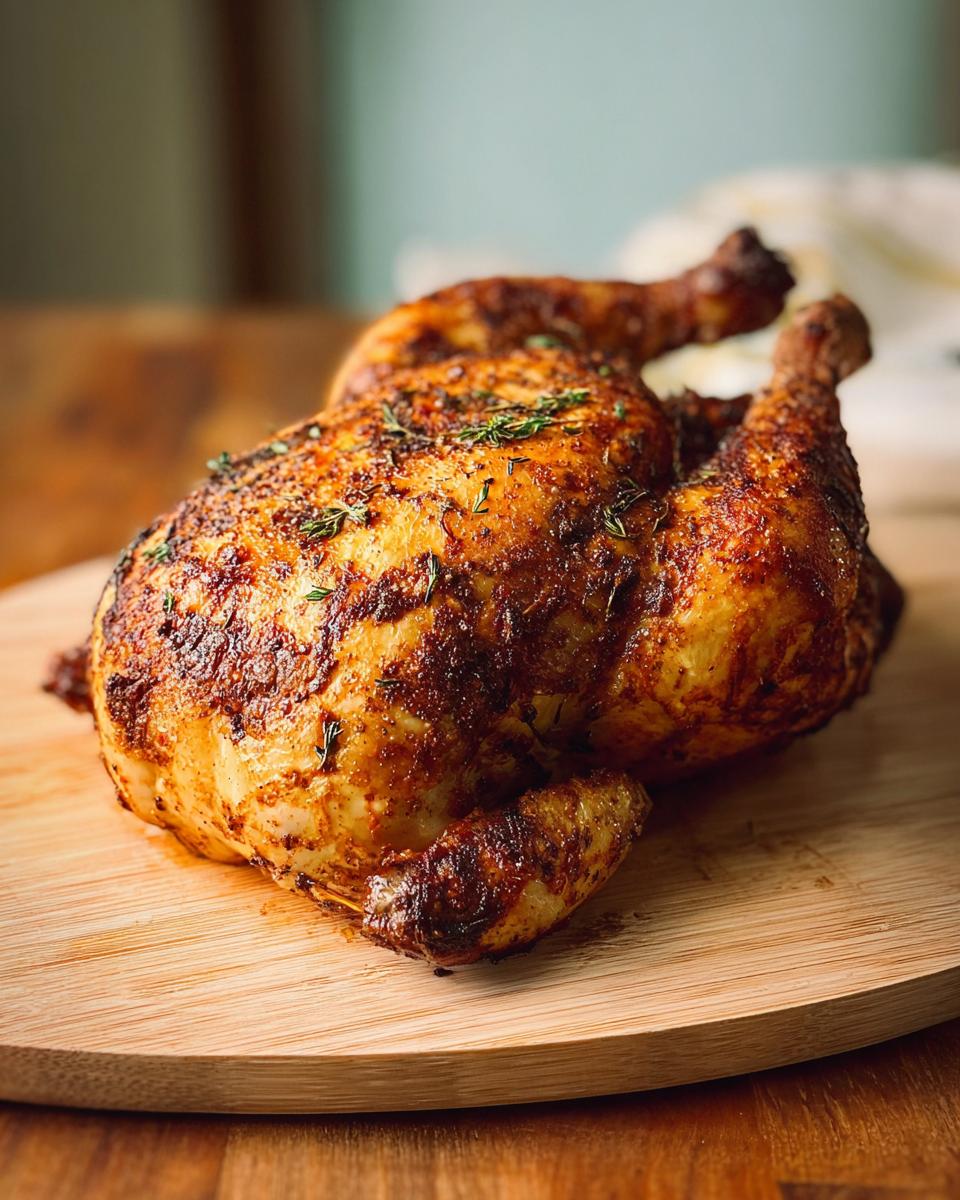
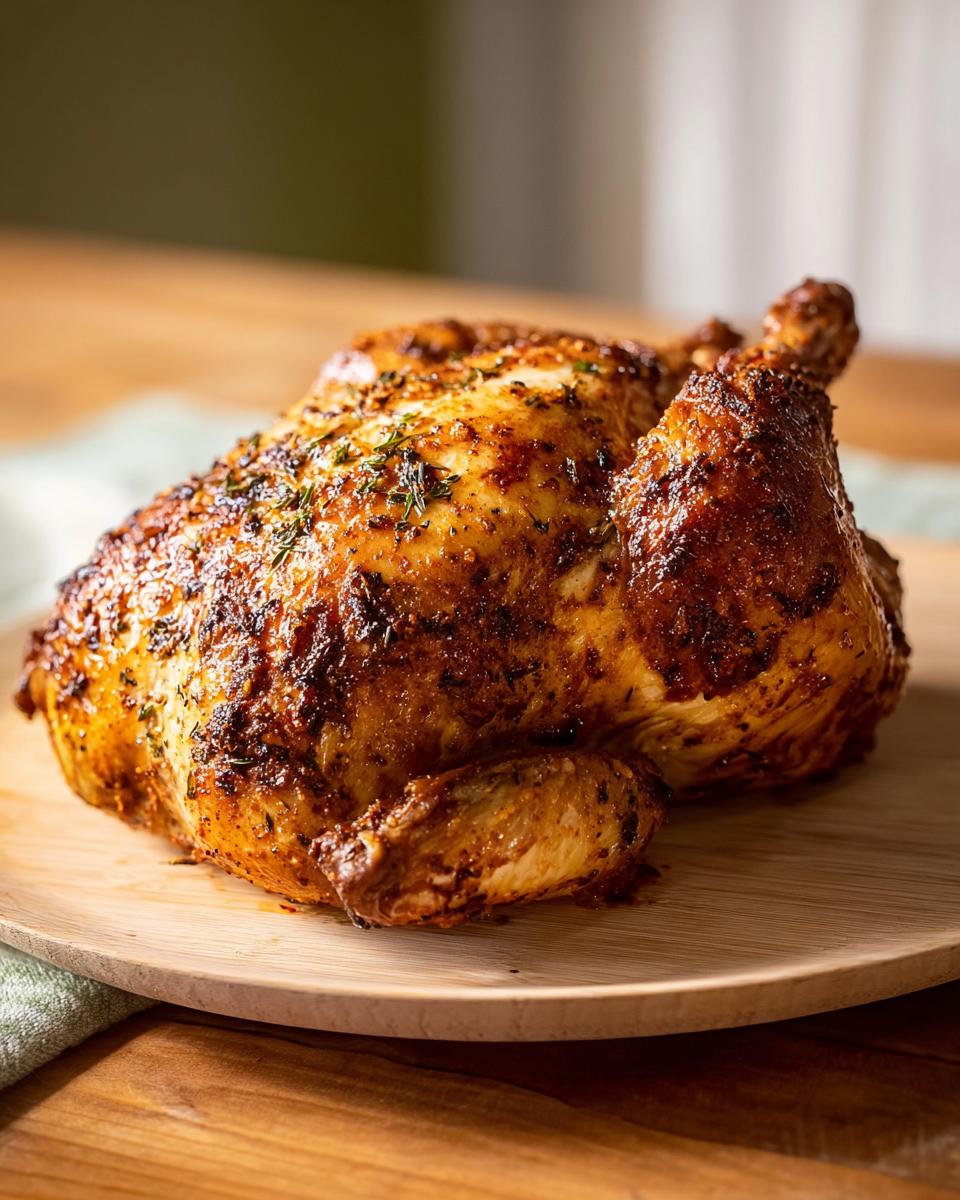
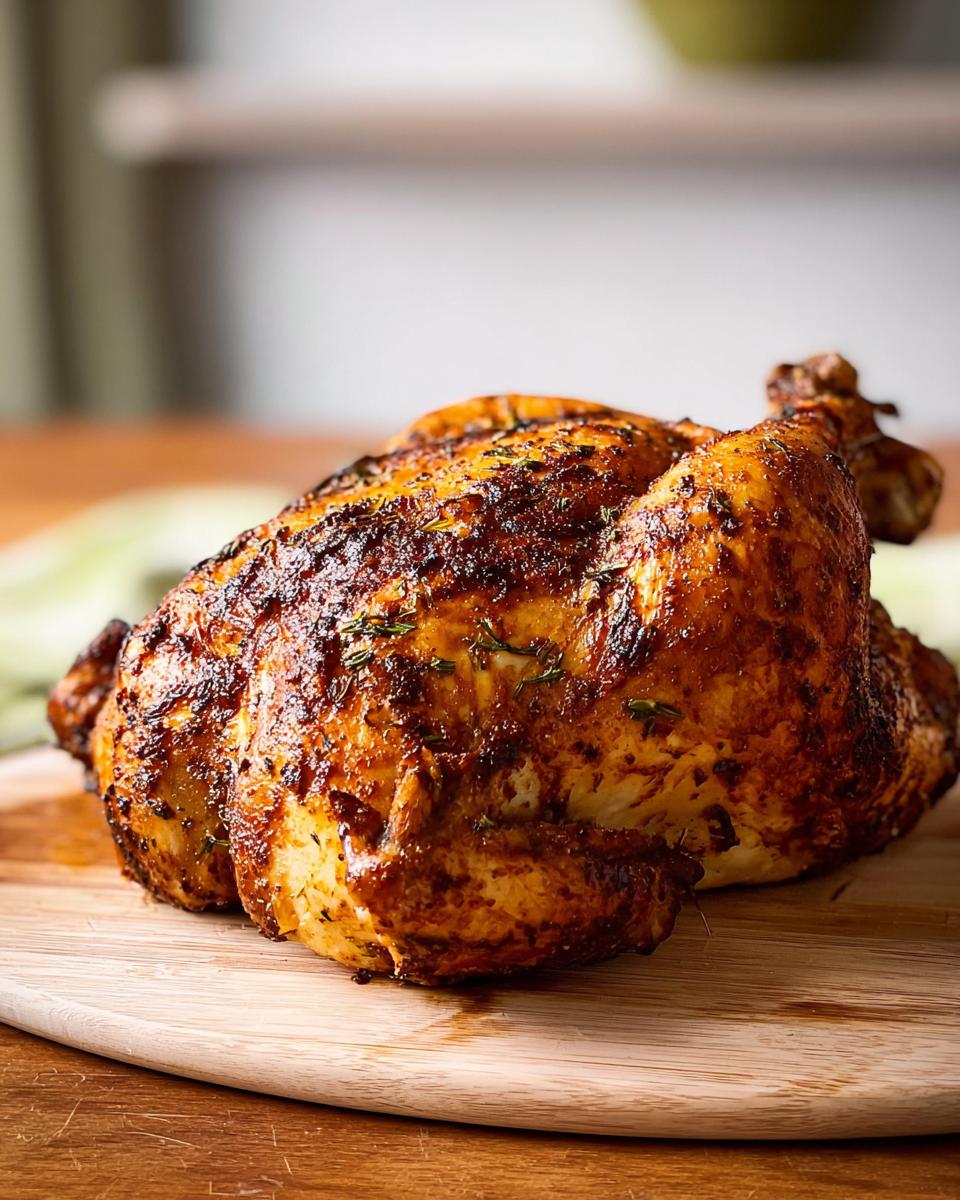
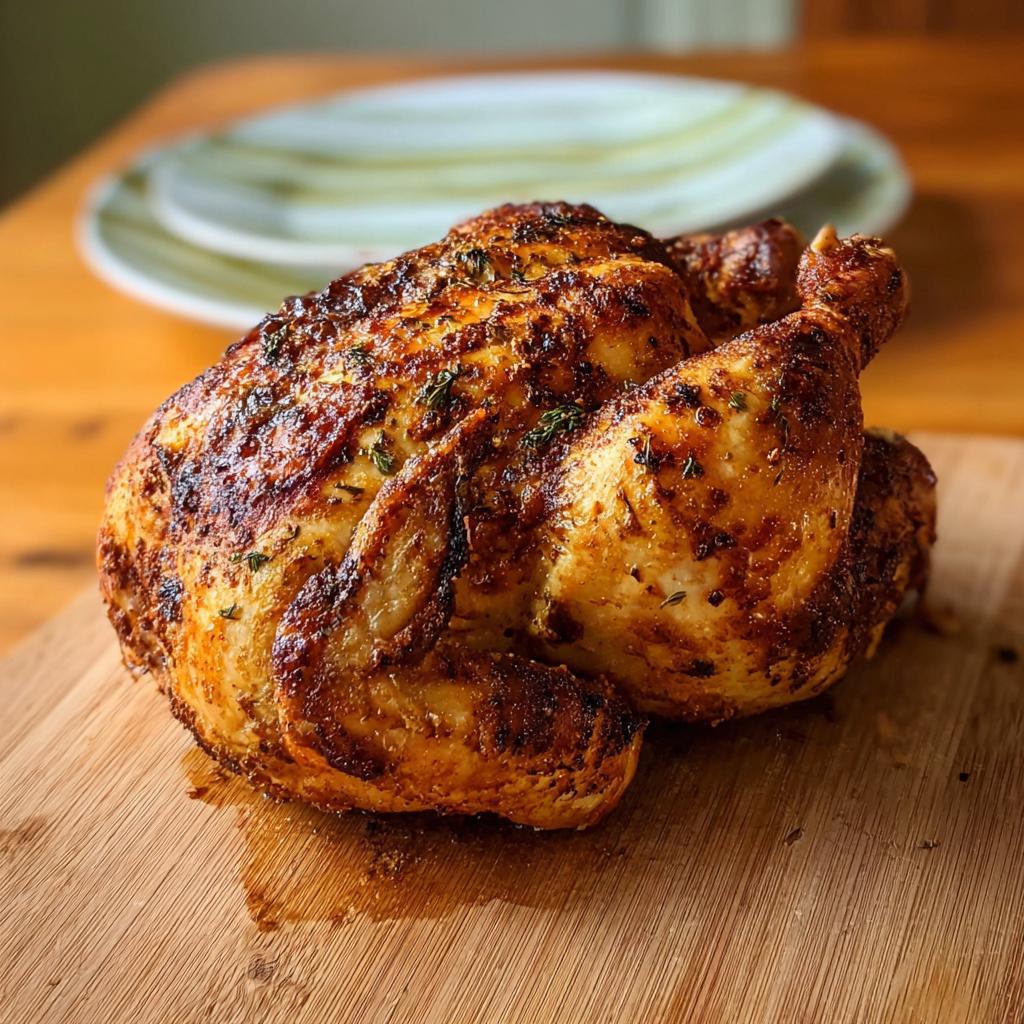
This whole chicken recipe is your gateway to air fryer greatness. It’s super straightforward, uses common seasonings you probably already have, and the outcome is just phenomenal. Forget dry, bland chicken forever! This method guarantees a juicy, savory bird with skin that’s delightfully crunchy, making it an absolute winner for any weeknight dinner or even a special occasion when you want to keep things simple but delicious.
Ingredients for Your Air Fryer Whole Chicken
Alright, let’s get everything ready for our star player: the whole chicken! You’ll need a chicken that’s about 5 pounds – make sure to take out those giblets from inside if they’re still there, you know, the little baggie that usually comes tucked inside. Then, grab your olive oil, about 2 tablespoons. For the flavor party, we’re mixing up 2.5 teaspoons of Italian seasoning, another 2.5 teaspoons of poultry seasoning, 2 teaspoons of paprika for that lovely color, and 2 teaspoons of salt. Easy peasy, right?
Ingredient Notes and Substitutions
So, about those seasonings! Italian seasoning and poultry seasoning are generally pretty common, but if you don’t have them, no worries! For Italian seasoning, you can often do a simple mix of dried basil, oregano, thyme, and maybe a pinch of rosemary. For poultry seasoning, a blend of sage, thyme, marjoram, and sometimes rosemary and nutmeg works wonders. If you’re really in a pinch, just use a good all-purpose seasoning blend or even just extra salt, pepper, and garlic powder. The goal is flavor, and we can always improvise! That’s the beauty of home cooking, isn’t it?
Step-by-Step Instructions for Air Fryer Chicken Perfection
Alright, let’s get this chicken party started! First things first, preheat your air fryer to 360 degrees F (that’s 180 degrees C). Make sure you’re following your air fryer’s manual for the best preheat. While that’s warming up, grab a small bowl. In goes your 2 tablespoons of olive oil, 2.5 teaspoons of Italian seasoning, 2.5 teaspoons of poultry seasoning, 2 teaspoons of paprika, and 2 teaspoons of salt. Give that a good whisk until it’s all combined into a lovely paste. Now, take your whole chicken and pat it super dry with paper towels – honestly, this is one of my biggest secrets for crispy skin! Then, slather that spice mixture all over the chicken. Don’t forget to get just under the wings too. Pop the chicken in your air fryer basket, breast-side down. Let it cook for a good 45 minutes. No peeking! After 45 minutes, carefully, and I mean CAREFULLY, use your tongs to flip the chicken over. Keep cooking for another 20 minutes or so, or until a thermometer poked into the thickest part of the thigh reads 165 degrees F (74 degrees C). This is super important to make sure it’s cooked through safely. Once it’s done, take it out, put it on a cutting board, and let it rest for 10 minutes. Trust me, waiting is hard, but it makes all the difference for juicy chicken!
Tips for Achieving Crispy Air Fryer Chicken
Want that extra-crispy skin? My biggest tip is to pat that chicken *bone dry* with paper towels before you even think about adding the oil and seasonings. Moisture is the enemy of crispiness! Also, make sure you don’t overcrowd the air fryer basket; give that chicken some breathing room so the hot air can get all around it. If your chicken is too big or you’re cooking more than one, it’s better to cook in batches. You want that glorious, golden-brown, crunchy skin, and these little tricks will get you there every time!
Understanding Your Air Fryer for Chicken Success
So, you’ve got your air fryer, and you’re ready to tackle some chicken, but maybe you’re wondering, “Is it really *on*?” or “Did I preheat it right?” Don’t you worry, I’ve been there! Figuring out your air fryer is super simple, and once you get the hang of it, cooking chicken becomes a breeze. My biggest tip is to always check your manual, as they can be a bit different. Most have a light or a sound that lets you know when it’s reached temperature; just give it about 5 minutes to get nice and hot before you add your food. For most chicken recipes, a temperature around 360-400°F (180-200°C) is your sweet spot. It really makes all the difference for that perfect golden-brown finish!
Air Fryer vs. Oven: Why Air Fryer Chicken Wins for Beginners
Honestly, when it comes to chicken for beginners, the air fryer just can’t be beat. Think about it: ovens take ages to preheat, and sometimes the chicken can end up a bit dry or unevenly cooked. Your air fryer? It’s ready to go in minutes, and that hot air circulation gives you that amazing crispy skin and juicy inside that we all crave, way faster than an oven ever could. It’s like magic, but better because it’s real!
Frequently Asked Questions About Air Fryer Chicken
Got questions? I’ve got answers! So many of you have reached out with really common concerns when you’re starting out with air fryer chicken, and that’s totally normal. Let’s clear a few things up so you can cook with confidence!
Can I cook a frozen chicken in the air fryer?
Okay, so while the air fryer is amazing, cooking a whole frozen chicken isn’t usually recommended. It’s really hard to get the inside cooked through safely and evenly without burning the outside. My advice? Always thaw your chicken completely first. For smaller pieces like wings or tenders, you *might* be able to get away with cooking from frozen, but you’ll need to adjust the time and temperature and keep a super close eye on it. For a whole chicken, though? Thawing is a must!
How long does it take to cook chicken wings in an air fryer?
This is a great question because wings are so popular! For regular-sized chicken wings, you’re generally looking at about 18-25 minutes at 380°F (190°C) in the air fryer. The exact time can change depending on the size of your wings and your specific air fryer model. My best tip is to give them a good shake halfway through and check for doneness and crispiness. You want them to be golden brown and cooked all the way through.
What’s the best way to season air fryer chicken?
Oh, the seasoning! This is where the fun really begins. For a whole chicken, a simple rub of olive oil, salt, pepper, paprika, and some herbs like Italian or poultry seasoning (like we used in the recipe!) is fantastic. For other chicken cuts, like breasts or thighs, you can get creative with marinades, spice rubs, or even just a drizzle of sauce after cooking. Just remember that air fryers cook things really quickly, so very wet marinades might cause more splatter. A good rule of thumb is to pat your chicken dry first, then apply your seasonings. You can always find more amazing ideas for meal planning, which helps with seasoning too, over at Low Carb Meal Planner!
Do I need to flip the chicken when air frying?
Yes, absolutely! For most chicken recipes in the air fryer, especially larger pieces like a whole chicken or even thick chicken breasts, you’ll want to flip them at least once. This ensures that both sides get equally crispy and cook through evenly. It’s like giving your chicken a nice tan on both sides!
Serving Suggestions for Your Air Fryer Whole Chicken
Now that you’ve got this gorgeous, crispy whole chicken, what do you serve with it? Oh, the possibilities! I love to pair it with some simple roasted veggies like broccoli or asparagus – they cook up perfectly in the air fryer too, usually in half the time! Or, you know, some mashed potatoes or a nice big salad always hit the spot. If you’re looking for more make-ahead ideas, definitely check out these low-carb meal prep ideas; they’ll give you loads of inspiration for balanced, delicious sides!
Storage and Reheating Air Fryer Chicken
Don’t you hate when leftovers just don’t taste as good? I totally get it! For your amazing air fryer chicken, make sure it cools down before you tuck it into an airtight container in the fridge. It should be good for about 3-4 days. When you’re ready to reheat, the microwave is quick but can make it a bit softer. For that crispy skin magic, I highly recommend popping it back into the air fryer for a few minutes at around 350°F (175°C) until it’s warmed through and the skin is revived. It’s like it’s almost as good as when it was freshly made! You might even find some cool meal prep hacks, like these keto hacks, that can help with planning ahead!
Estimated Nutritional Information
Just a heads-up, like with any recipe, the exact nutritional info can change based on your specific chicken size and the brands you use. But, generally, a serving of this yummy Air Fryer Whole Chicken has about 350 calories, 22g of fat, 38g of protein, and less than 1g of carbs per serving. It’s a really fantastic way to get a delicious meal that’s pretty low-carb! If you’re looking to plan your meals, don’t forget to check out how to create a low-carb diet meal plan for more ideas.
Air Fryer Whole Chicken
Ingredients
Equipment
Method
- Gather your ingredients. Preheat your air fryer to 360 degrees F (180 degrees C) according to the manufacturer’s instructions.
- In a small bowl, whisk together the olive oil, Italian seasoning, poultry seasoning, paprika, and salt.
- Pat the chicken dry with paper towels. Brush the spice mixture all over the chicken, making sure to get underneath the wings.
- Place the chicken in the air fryer basket, breast side down. Cook for 45 minutes without disturbing it.
- Carefully flip the chicken over using tongs. Continue to cook until an instant-read thermometer inserted into the thickest part of the thigh reads 165 degrees F (74 degrees C), about 20 more minutes.
- Remove the chicken to a cutting board and let it rest for 10 minutes before carving.
Notes
Tried this recipe?
Let us know how it was!
James Richardson – Certified Budget Nutrition Economist
My expertise in affordable low-carb eating was born from necessity during graduate school, when ramen noodles threatened to derail both my metabolism and my economics dissertation. Later, feeding a family of five on a teacher’s salary while my wife completed nursing school taught me that eating well doesn’t require a trust fund.
With my MBA in consumer behavior analytics, I treat grocery budgets like investment portfolios. My breakthrough “Dollar-Per-Day Keto” challenge proved sustainable low-carb eating could be achieved for under $30 weekly per person through strategic bulk purchasing and what I call “ingredient arbitrage” – buying versatile basics when they’re cheapest.
I’ve developed over 200 budget-optimized recipes with real-time pricing calculations that adjust based on regional grocery data. Unlike lifestyle bloggers who assume unlimited budgets, my meal plans work with food stamp restrictions, dollar store ingredients, and the reality that consistent access to “right” foods often determines dietary success.
My background as a budget coordinator for a regional food bank taught me how economic constraints intersect with nutritional needs. When I’m not playing competitive chess or collecting vintage calculators, I’m proving that nutrition becomes a luxury only when you approach it backwards – optimize for value instead of convenience, and eating well becomes the most economical choice.